Halloween Hot Chocolate Bombs – Fun, Festive & Easy to Make!
Halloween Hot Chocolate Bombs are the ultimate way to stir up some spooky fun this season.
From festive designs to flavor-packed fillings, you’ll learn exactly how to craft hot chocolate bombs that are as thrilling to look at as they are to sip.
Halloween recipes are all about having fun in the kitchen—think playful, spooky, and sweet treats that everyone will love!
There’s just something magical about watching a chocolate shell melt into warm milk, revealing hidden surprises inside. And when you give it a Halloween twist? Total showstopper.

How to Make Halloween Chocolate Bombs:
Before you get started, be sure to gather all your supplies and ingredients—and don’t forget to scroll to the bottom of the post to print the full instructions!
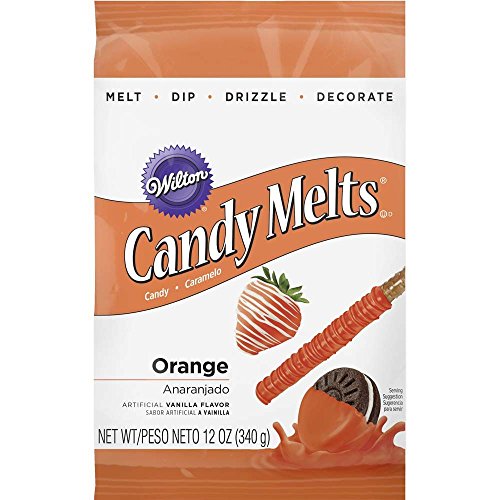
- Start by freezing a plate and melting orange candy melts.
- Coat the molds with melted candy, freeze, and repeat for a second layer.
- Once set, remove the shells and warm a plate to melt the edges slightly.
- Fill one half with hot chocolate mix and marshmallows, then seal with another shell.
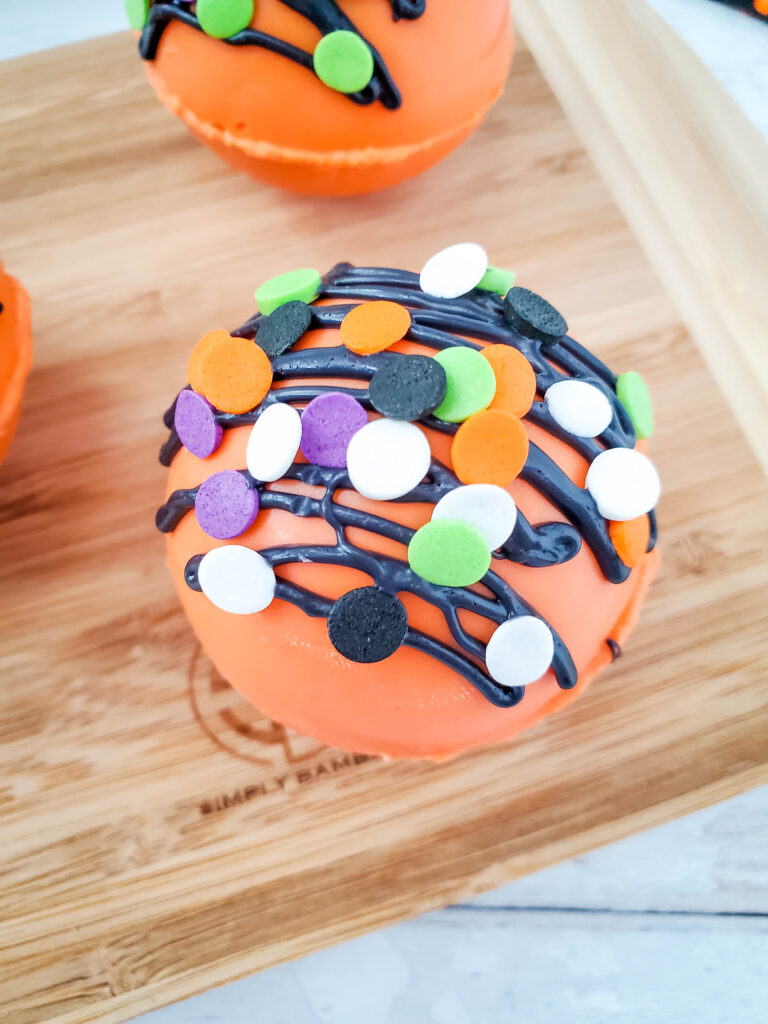
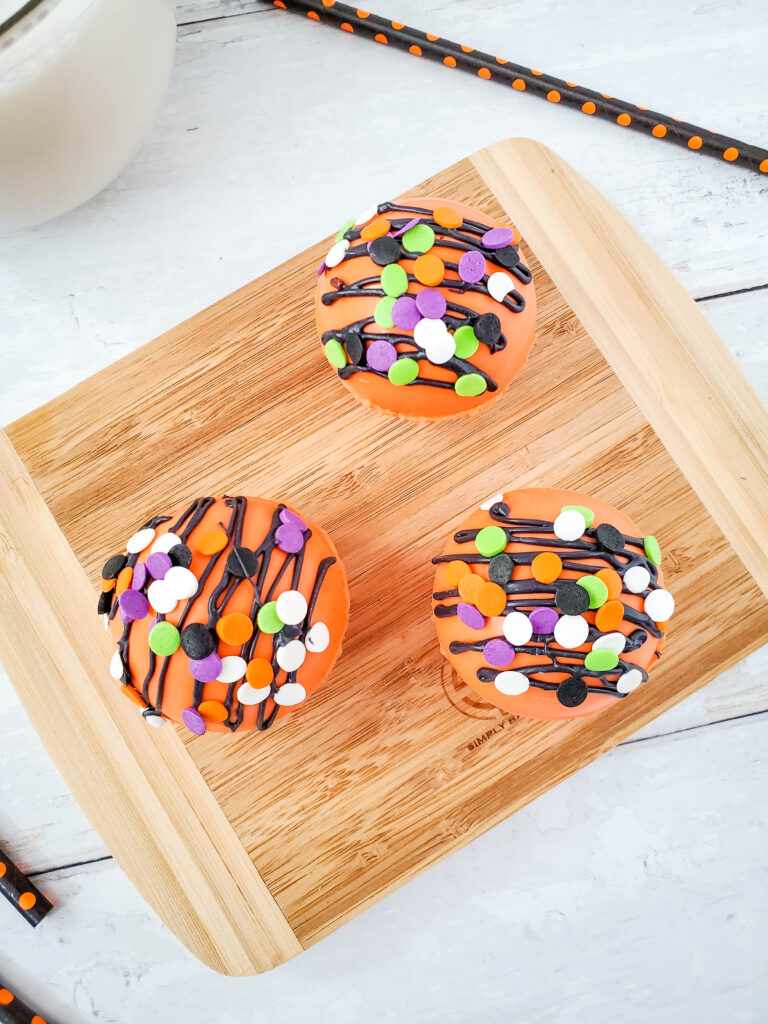
- Drizzle melted black candy on top and finish with Halloween sprinkles. Get creative with decorations! Use edible glitter, candy eyes, or themed sprinkles for a spooky touch.
- Let them set, then store or enjoy by pouring hot milk over the bomb and watching it melt into a festive, chocolatey drink.


Tips for Making Hot Cocoa Bombs:
- Use good-quality candy melts for smooth melting and easy molding. If the candy is too thick, add a tiny bit of coconut oil to thin it out.
- Apply two coats of melted candy in the molds to prevent cracking and make the shells more durable.
- Keep everything cold—chilled molds and plates help the candy set faster and reduce breakage.
- Don’t overfill with cocoa mix or marshmallows, or the bombs might not seal properly.

Stored in an airtight container in the fridge or a cool, dry place, they can last up to 2–3 months.
Yes! Just be sure to temper the chocolate properly so it sets well and has a nice snap.
They may be too thin or popped out of the mold too early. Try adding a second layer and let them chill longer before removing.

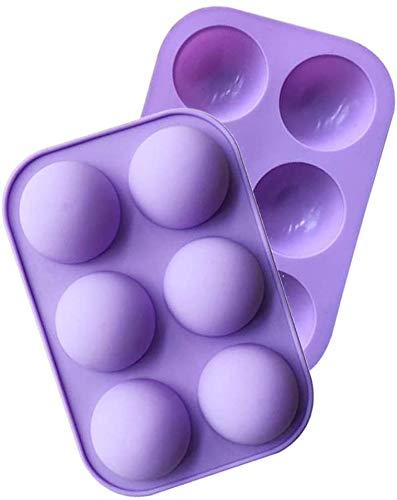
2 Pack 6-Cavity Semi Sphere Silicone Mold, Baking Mold for Making Hot Chocolate Bomb, Cake, Jelly, Dome Mousse (Purple) Wilton Orange Candy Melts® Candy, 12 oz.Chocodrizzler Candy Wafers Microwaveable Pouch 2 Oz (Black)Starbucks Classic Hot Cocoa, 30 Ounce (Pack of 1)Sweets Indeed, Halloween Sprinkles, Bulk, 10 ounce, Edible Sprinkle Mix, Perfect for Cake Decorations, Baking, Ice Cream, Cookies, Cupcake Topper (Halloween)Sweets Indeed, Halloween Sprinkles, Bulk, 10 ounce, Candy Eyeballs, Edible Eyes Sprinkle Mix, Perfect for Cake Decorations, Baking, Ice Cream, Cookies, Cupcake Topper (Monster Mash)Jet-Puffed Vanilla Marshmallow Bits (3 oz Marshmallows Shaker)


If you’re planning a Halloween dessert table or just love festive treats, be sure to check out these other fun and easy ideas too!
- Easy Oreo Spider Cookies are a no-bake Halloween treat that’s creepy-cute and super simple for little hands to help with.
- Build a DIY Halloween Buttercream Board full of colorful frosting that doubles as dessert and decoration.
- No Bake Pumpkin Oreo Truffles are festive bites are bursting with fall flavor and couldn’t be easier to make.
- Wondering What to Make with Chocolate Chips Besides Cookies? Get inspired with fun and surprising ways to use up that bag of chocolate chips!

Halloween Hot Chocolate Bombs
Ingredients
- 12 oz orange candy melts
- 2 oz black candy melts
- 6 tbsp hot cocoa mix
- Halloween confetti sprinkles
Instructions
- Place a large plate into the freezer.
- Pour the orange candy melts into a bowl and heat in the microwave in 30 second intervals, stirring well after each heat session, until the candy is fully melted.
- Add a small spoonful of melted candy to all of the mold cavities, then coat the melted candy around the mold, making sure to get all the way up the sides.
- Place candy coated molds into the freezer for 5 minutes.
- Repeat steps 3 and 4 to add a second coat of melted candy to the molds.
- Remove the chilled plate and candy coated mold from the freezer. Carefully remove each candy coated sphere from the mold and place onto the chilled plate.
- Heat the small plate in the microwave for 2 minutes.
- Put one half sphere upside down on the heated plate to slightly melt the candy coated edge.
- Fill it with 1 tablespoon cocoa mix.
- Repeat step 9 with another half sphere and adhere the two together. The melted candy should fuse them together nicely, but if not, just use your finger to add a little melted candy around the seam.
- Add the black candy to a small baggie, then heat for 30 seconds. Massage the bag a bit, then snip off the end of the baggie and drizzle a little bit of black candy over each cocoa bomb.
- Add confetti sprinkles.
- To serve, place a cocoa bomb into a mug, then pour 6 ounces of hot water or milk over the cocoa bomb. Stir well and enjoy!

These look so good! I can’t wait to make them during Fall break with my kids!
Reesa, these are AWESOME, so we will be featuring them this week on the Creative Crafts Linky Party starting TOMORROW!