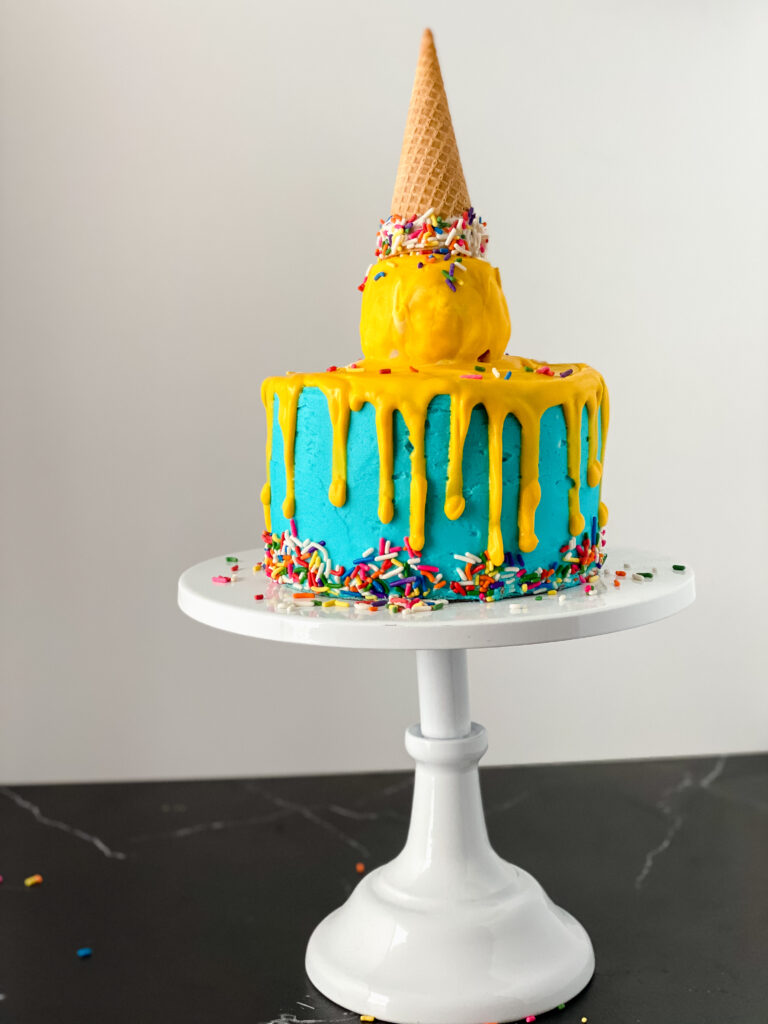
Melted Ice Cream Cake
If you’ve been searching for a dessert that truly steals the spotlight, this melted ice cream cake is made for moments when “just a cake” won’t cut it.
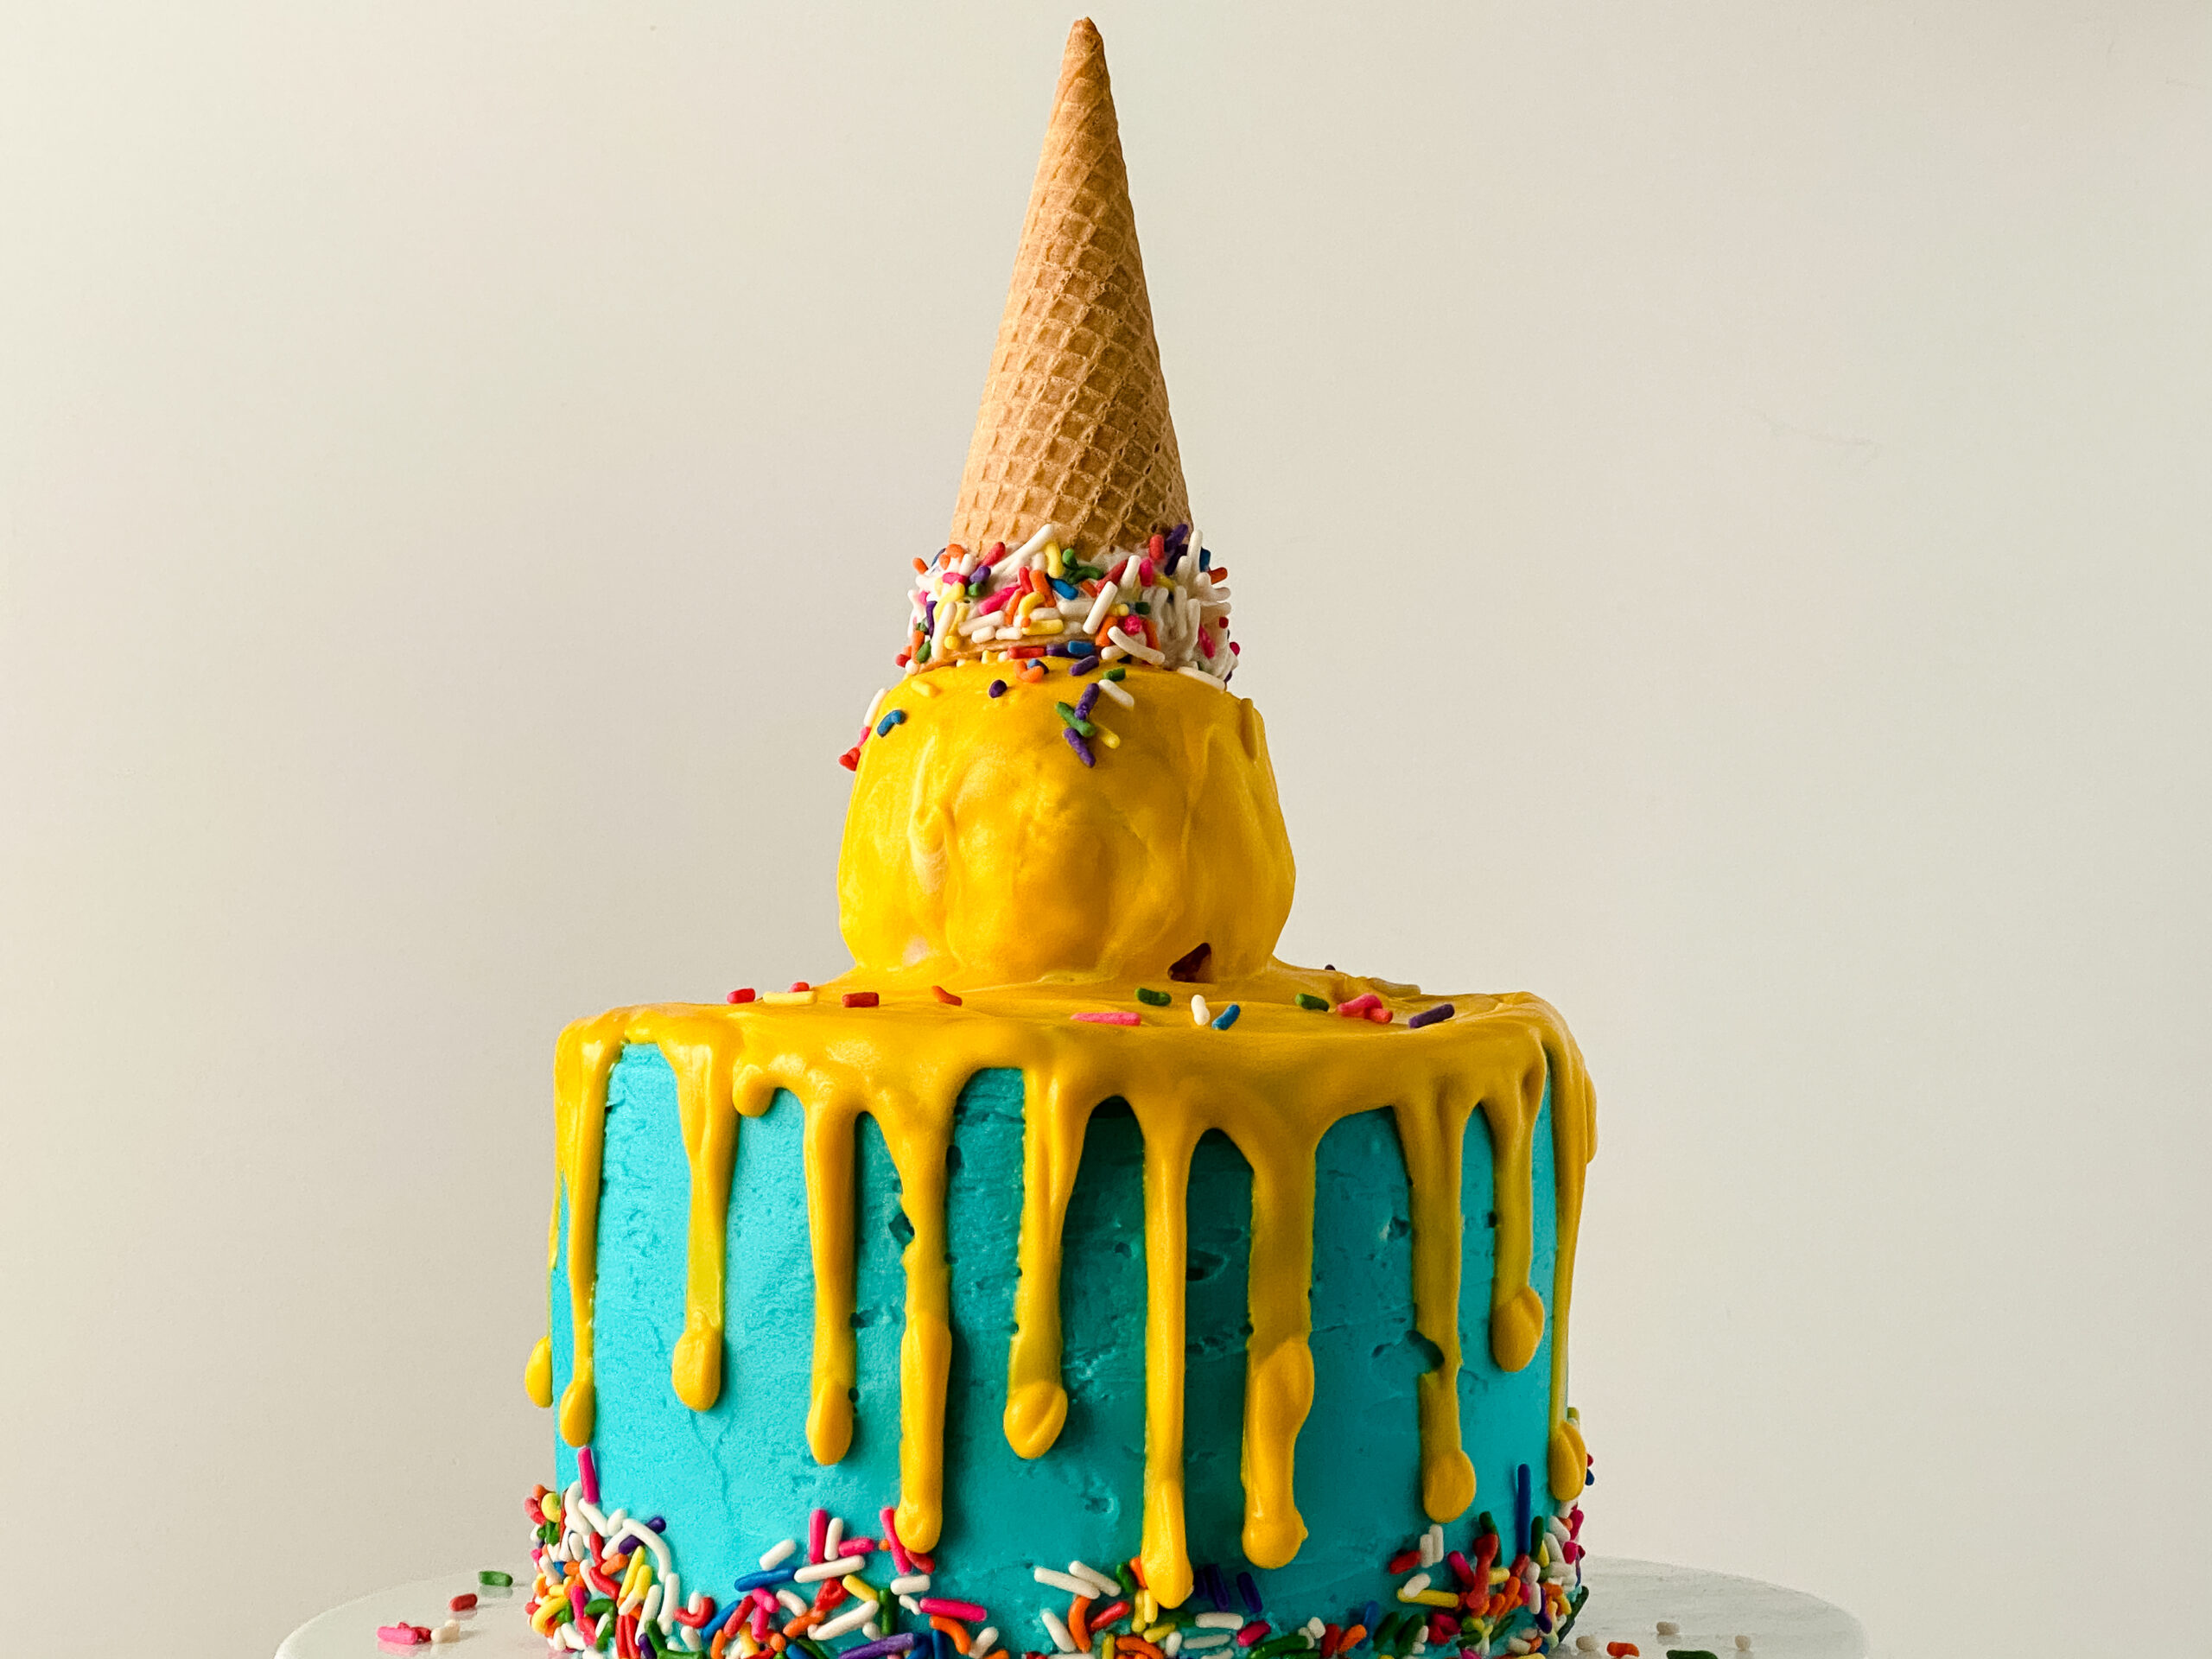
Designed to look like an ice cream cone that’s adorably melting down the side, this cake recipe is all about presentation, drama, and that instant wow when it hits the table.
Underneath the playful design, you’ll find layers of delicious, tender cake, buttercream frosting, and a rich chocolate ganache that drips down just like real ice cream on a warm day, finished with a crisp cone for texture and fun.
This cake is more of a decorating project than a quick bake and is best for intermediate bakers or anyone who enjoys hands-on cake decorating.
This is the cake you make for summer birthdays, pool parties, end-of-school celebrations, or anytime you want a show stopping dessert!

As an Amazon Associate, I earn from qualifying purchases. This post may contain affiliate links, meaning I may receive a small commission at no extra cost to you when you make a purchase through my links. Thank you for supporting my kitchen!
How to Make a Melting Ice Cream Cone Cake
- Start with a fully baked 2-layer 8-inch round cake – Either homemade or made from a boxed mix.
- The cake should be fully chilled for at least 30-60 minutes before decorating. A cold cake is sturdier and much easier to frost cleanly, especially with the weight of the Rice Krispy scoop and cone on top.
- Make your buttercream frosting. You’ll need a generous amount of buttercream for filling, crumb coating, final coating, and “glue” on the board. This is not a minimal-frosting cake.
- Prep the ice cream cone by dipping the rim into melted white candy melts, rolling it in sprinkles or mini chocolate chips, and setting it aside to dry.
- Create the “ice cream scoop” by pressing together slightly warm Rice Krispy treats until it’s large enough to sit securely on top of the cake—using more treats will give a more dramatic, oversized scoop. You can lightly grease your hands with butter or cooking spray to help prevent sticking.
- Let the scoop cool and firm up before placing it on the cake so it holds its shape.
- Secure the cake to a cake board with a little bit of buttercream, fill and stack the layers, then frost the entire cake smoothly. For sharper edges, chill the cake briefly before finishing the final coat of frosting. Press sprinkles around the bottom edge while the frosting is still soft.
- Melt colored candy melts to create the dripping “melted ice cream” effect, choosing colors that mimic real flavors like vanilla, strawberry, or chocolate.
- Place the Rice Krispy scoop on top of the cake, coat it with melted chocolate, then gently add the upside-down cone. Once you start the drip, work quickly.
- Finish by piping chocolate drips around the edges of the cake, letting them fall naturally for that realistic melted ice cream look.


Don’t Forget To…
- Scroll down to print the full recipe with step-by-step instructions and exact measurements.
- Check out my Kitchen Essentials for the pans, mixing bowls, and baking tools I use to make this recipe a breeze.
- Save or share this recipe on Pinterest!
Most bakers use 2–4 pre-packaged Rice Krispy treats. Two will give you a subtle scoop, while four creates a more dramatic, oversized “ice cream” look.
Yes, but keep in mind that real chocolate sets faster and can be thinner. Candy melts are more forgiving and easier to control for the drip. If needed, thin either option with a small amount of coconut oil or shortening.
If the drip is too thick, the candy melts likely need to be thinned slightly. Add ½–1 teaspoon of coconut oil or shortening and stir until smooth. The drip should be warm but not hot so it doesn’t melt the buttercream underneath.
Add a small amount of melted chocolate or buttercream inside the cone before placing it upside down on the Rice Krispy scoop. This acts like glue and helps keep it in place.
Remove the cone and Rice Krispy scoop before slicing the cake. This makes serving easier and keeps slices neat.
Baking eBook Bundle Baking Troubleshooting Guide

AWTBDP 8 Inch Cake Pan Set of 2, Nonstick Stainless Steel Round Layer Cake Baking Pans with 100PCS Parchment Papers, Circle Cake Pan Tins for Birthday Christmas, Non-Toxic & Healthy, Dishwasher Safe82 Pcs Cake Decorating Kit with Non-Slip Turntable, Stand,Leveler, 12 Piping Nozzles, Spatulas,Cupcake, 2 Reusable & 50 Disposable Bags,Complete Starter Set for Beginners & Home Bakers
Ann Clark Professional-Grade Gel Food Coloring Made in USA .7 oz, 12 Colors
Cake Mate Rainbow Valentines Sprinkles with resealable lid – Delicious Dessert Sprinkles for Ice Cream, Cookies, Baked Goods, Donuts 10.5 oz Tub (Rainbow Jimmies)


VIVIRBIEN Wooden Cake Stand with Lid, Acacia Cake Stand with Glass Dome, 11-Inch Versatile Dessert Stand with Strong Magnetic Pedestal, Cake Holder for Birthday/Kitchen/Party/CharcuterieMartha Stewart Patterson 10
Martha Stewart Highbrook 10-Inch Jadeite Cake Stand with Glass Dome – Vintage-Style Pedestal Dessert Plate for Cakes and Pastries, Decorative Covered Serving Platter


Looking for even more fun and festive ideas to round out your celebration? These creative dessert recipes and party treats are perfect for making birthdays feel extra special.
- Birthday Cake Recipes are a great way to keep the celebration going, whether you’re looking for classic favorites, themed cakes, or showstopping designs that double as the centerpiece of the party.
- Balance out the sweets and keep guests happy, offering easy, grab-and-go birthday party snacks that are perfect for kids, adults, and everything in between.
- Ice Cream Cone Cake Pops are a playful twist on traditional cake pops, combining cake, frosting, and cone details into a bite-sized treat that’s ideal for parties, dessert tables, or party favors.
Melting ice cream cake
Ingredients
- 1 prepared 8-inch round cake, 2 layers (homemade or boxed) cooled
- Vanilla buttercream frosting (enough for filling and frosting) tinted blue
- 1 sugar cone
- White candy melts
- Candy melts in desired colors (for drip)
- Sprinkles
- 2-4 pre-packaged Rice Krispy treats
- Parchment paper
Instructions
- Bake your cake layers if needed and allow them to cool completely. Chill the layers for 30–60 minutes before decorating for easier frosting and better stability.
- Melt white candy melts in 30-second intervals, stirring until smooth.
- Dip the rim of the sugar cone into the melted candy, then roll in sprinkles or mini chocolate chips. Set aside to dry completely.
- Slightly warm the Rice Krispy treats and press them together to form a rounded “scoop.” Use 2 treats for a smaller scoop or 4 for a dramatic look. Lightly grease your hands if needed. Let the scoop cool and firm up.
- Spread a thick layer of buttercream on the cake board to act as glue.
- Place the first cake layer on top, fill with buttercream and sprinkles if desired, then stack the second layer on top.
- Cover the cake with buttercream, smoothing the sides and top with an offset spatula. For sharp edges, place a second cake board on top of the cake, smooth the sides, then freeze for 15–20 minutes. Remove the top board and finish frosting the top.
- While the frosting is still soft, press sprinkles around the bottom edge of the cake over a parchment-lined baking sheet.
- Melt colored candy melts in 30-second intervals, stirring well. If too thick, add ½–1 teaspoon coconut oil or shortening to thin. Keep the drip warm, not hot.
- Place the Rice Krispy scoop in the center of the cake. Spoon melted candy melts over the scoop, letting it drip naturally. Add a small amount of melted chocolate or buttercream inside the cone and place it upside down on top of the scoop.
- Pour remaining melted candy into a piping bag. Snip a small hole at the tip and pipe around the edges of the cake, turning the cake slowly on the turntable to create a natural drip. Fill any gaps between the drip and the “melted ice cream” on top as needed.
Notes
- Remove the cone and Rice Krispy scoop before slicing for easier serving.
- Store the cake in the refrigerator and bring to room temperature 15–20 minutes before serving.
2 Comments