Best Edible Markers for Cookies: Tips & Tricks
If you’re wondering what to use to write on cookies, colorful edible markers are the perfect tool for writing on cookies.
They’re designed to work with various edible surfaces, so you can easily create custom messages or artwork on your cookies.
These markers make decorating so much easier and more fun, allowing you to add intricate designs, messages, or even simple doodles with ease.
Whether you’re crafting cookies for a special occasion or just making a batch for a fun family activity, edible markers give your treats that extra flair.
Check out our delicious cookie recipes for the perfect base to showcase your decorating skills.

How to Use Edible Markers on Cookies:
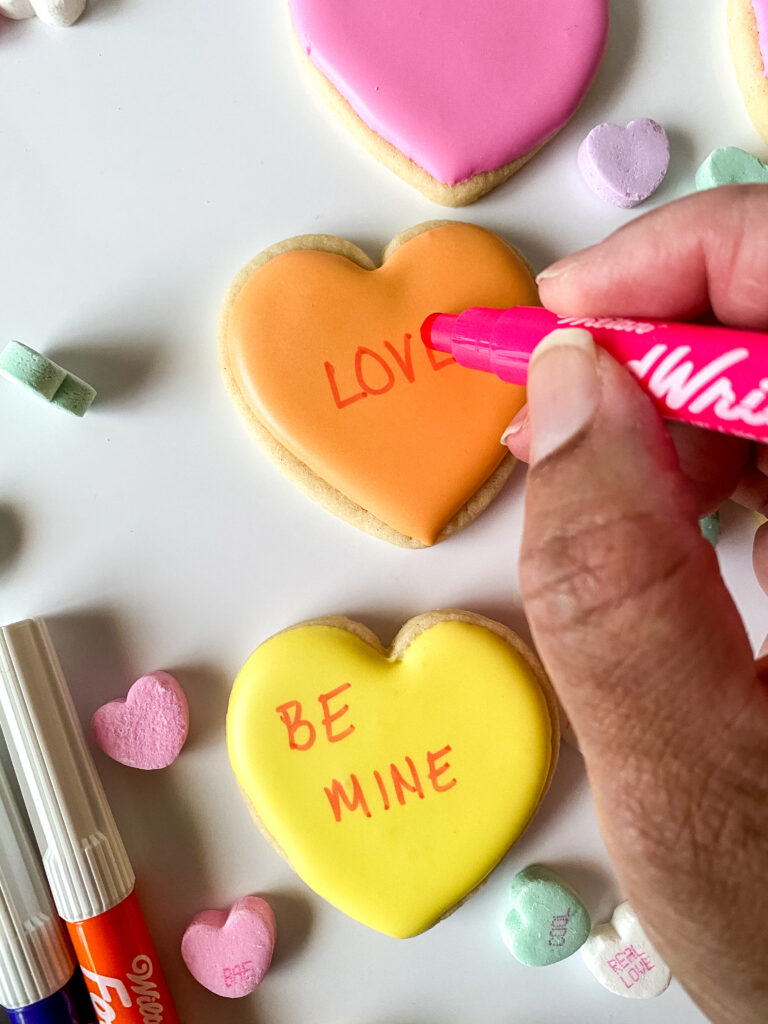
These markers work wonderfully on cookies, especially those with royal icing, fondant, or dry buttercream. They allow for detailed designs without the mess or hassle of using piping bags or other decorating tools.
- To get started, you simply need a clean surface, such as royal icing or fondant, and an edible marker of your choice.
- Gently draw your designs, messages, or decorations directly onto the cookie, just like I did with these Conversation Heart Cookies!
- Make sure the icing is fully dry before you start to avoid smudging.
- Once your design is complete, let the marker ink dry, and you’re ready to serve your beautifully decorated cookies!

Best Edible Markers for Cookies:
The best markers for cookies are those that provide vibrant, smooth lines and are safe for consumption.
Look for markers that are food-grade and specifically labeled for use on cookies or cakes.
The most popular options are brands that offer a variety of colors and are trusted by bakers for their precision and ease of use.


Absolutely! Edible markers are made with food-safe ingredients and are approved for use on cookies and other baked goods. However, it’s important to ensure you’re using markers labeled specifically for food use to ensure they’re safe for consumption.
Edible markers can work on buttercream, but you need to make sure the buttercream is firm and not too soft or greasy. Royal icing or fondant will hold the ink better, but if you’re using buttercream, make sure it’s set and dry before drawing on it.
To keep edible markers from smearing, make sure the surface of your cookies is completely dry before you begin decorating. If using royal icing, allow it to fully harden. For buttercream or fondant, let them set for a few minutes. Also, be careful not to touch the ink while decorating.
Edible markers work on a variety of surfaces, including royal icing, fondant, and even certain types of cookies with dry glazes or icings. You can use them to draw, write messages, or add intricate designs.
Edible ink typically dries within 10 to 15 minutes, but it’s always best to allow your cookies to sit for a little while to ensure everything is fully set. For thicker or wetter icing, you may want to wait longer before handling.

Want your cookies to stay soft and delicious? Discover the best tips for keeping your cookies fresh!
Craving cookies but short on time? Try these no-bake recipes for quick, delicious treats without turning on the oven!
Enjoy the warm, cozy flavors of gingerbread men cookies throughout the holidays or anytime!
Get the perfect sugar cookie recipe for every occasion—ideal for decorating, gifting, or enjoying as-is!

[amazon table=”62826″]
I’ve been baking a lot as a hobby lately, so I was thinking of buying food pens to use for decorating the pastries I’ve been making. I appreciate your advice.