Cherry Cheesecake Ice Cream Recipe
Cherry cheesecake ice cream is the ultimate frozen treat recipe for anyone who loves a good mash-up of rich, creamy, fruity, and tangy.
Learn how to make delicious ice cream from scratch—no fancy equipment required.
Whether you’re cooling down on a hot day or just craving something extra indulgent, you’re in for a dessert that feels like a slice of cherry cheesecake and a scoop of your favorite ice cream all in one.
This recipe combines swirls of sweet cherry filling in a velvety cream cheese ice cream base.
The best part? It’s incredibly easy to make and perfect for summer gatherings, birthday celebrations, or simply treating yourself.

Cherry Cheesecake Ice Cream Recipe: How to Make It
- Start by whipping very cold heavy cream until stiff peaks form.
- Once the cream is whipped, gently fold in sweetened condensed milk, vanilla extract, and softened cream cheese until smooth to maintain that fluffy, airy texture.
- Gently swirl in cherry pie filling, then pour the mixture into a loaf pan and freeze for at least 6 hours, although freezing overnight gives the best results for scoopable, creamy ice cream.
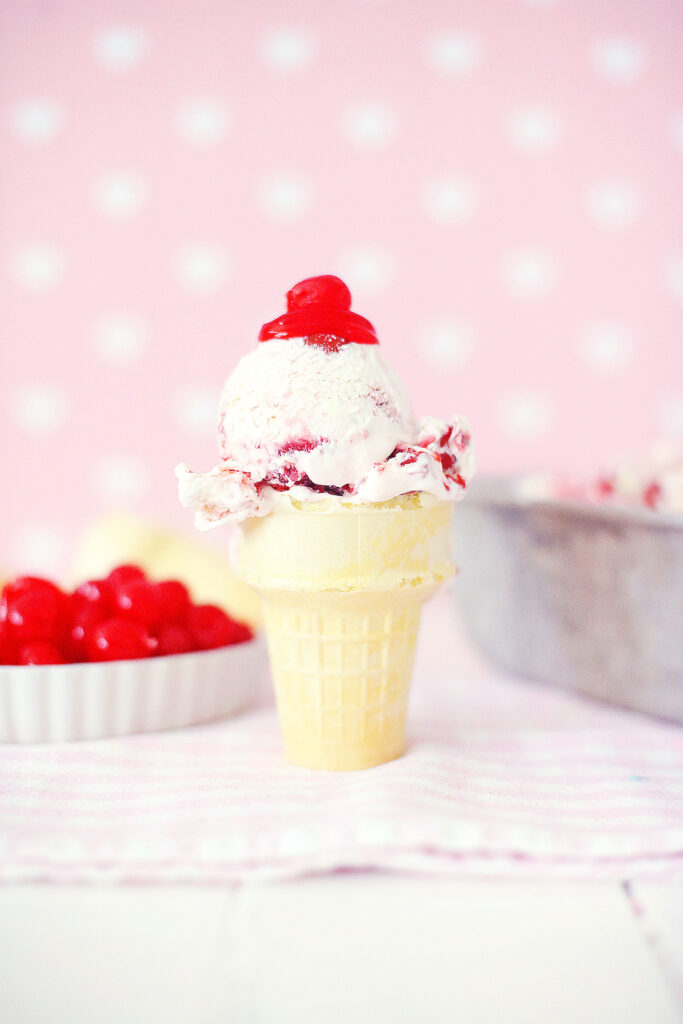
- When ready to serve, scoop into cones or bowls and top with extra cherry filling, maraschino cherries, or your favorite toppings for a creamy, dreamy dessert recipe!

Pro Tips: Add some crunch by sprinkling in some crushed graham crackers or shortbread cookies before freezing to give it that full cheesecake vibe. Or try different pie fillings like blueberry or strawberry for fun flavor variations.
Any freezer-safe container with a lid will work—just be sure to spread the mixture evenly.
Nope! That’s the beauty of no-churn ice cream—no special equipment required.
Let the ice cream sit at room temperature for 5–10 minutes before scooping for best results.

BALCI – Premium Ice Cream Containers (2 Pack – 1 Quart Each) Perfect Freezer Storage Tubs with Lids for Ice Cream, Sorbet and Gelato! – BlueIce Cream Containers Set of 2, 1.5 Quart Ice Cream Tub, Reusable Homemade Ice Cream Tubs with Stackable Freezer Storage Container for Yogurt, Sorbet, Gelato
OXO Good Grips Non-Stick Pro Ceramic Coated Metal Bakeware 1Lb Loaf Pan – Storm Blue
GORILLA GRIP BPA-Free Heavy Duty Ice Cream Scoop, Comfortable Ergonomic Handle, Professional Grade Scooper for Perfect Round Scoops, Spoon Frozen Hard Gelato, Sorbet, Cookie Dough, Kitchen Tool, Black
KitchenAid Value Bundle Artisan Series 5 Quart Tilt-Head Stand Mixer with Included Flex Edge Beater, KSM150FEER, Empire Red


Be sure to check out these delicious ideas too!
- Explore more Cherry Cake Recipes for sweet treats perfect for any celebration.
- Find creative and easy Recipes Using a Can of Cherry Pie Filling to make the most of what’s in your pantry.
- Cool off with these creamy and refreshing Homemade Ice Cream Recipes that are simple to whip up without an ice cream maker.
- And don’t miss these festive Christmas Ice Cream Treats that add a sweet, chilly twist to your holiday dessert table!


Cherry Cheesecake Ice Cream – No Churn Recipe
Ingredients
- 2 Cups of Heavy Whipping Cream
- 1 can of Sweetened Condensed Milk
- 1 tbsp of Vanilla Extract
- 4 oz of Cream Cheese – Softened
- 1 can of Cherry Pie Filling
- Ice Cream Cones if desired
- Maraschino Cherries – to top
Instructions
- Start by making the ice cream base. Using an electric mixer and a large bowl or stand mixer, place the whipping cream, and whip at high speed until thick, and stiff peaks have formed.
- Add the Sweetened Condensed Milk, Vanilla, and add Cream Cheese, and blend until smooth and creamy.
- Spoon Cherry Pie Filling into the cheesecake flavor base.
- Place the Ice Cream into a Loaf Pan, spreading evenly with a spoon or spatula as necessary.
- Cover with plastic wrap or foil and freeze for at least 6 hours or overnight before serving. Your ice cream should be nice and creamy when ready to serve!
- When ready to serve, scoop the Ice Cream into Ice Cream Cones or dishes.
- Spoon any remaining cherry mixture over the top of the Ice Cream and top with a maraschino cherry or other toppings like whipped cream, chocolate chips, nuts, etc., for an extra special treat!
One Comment