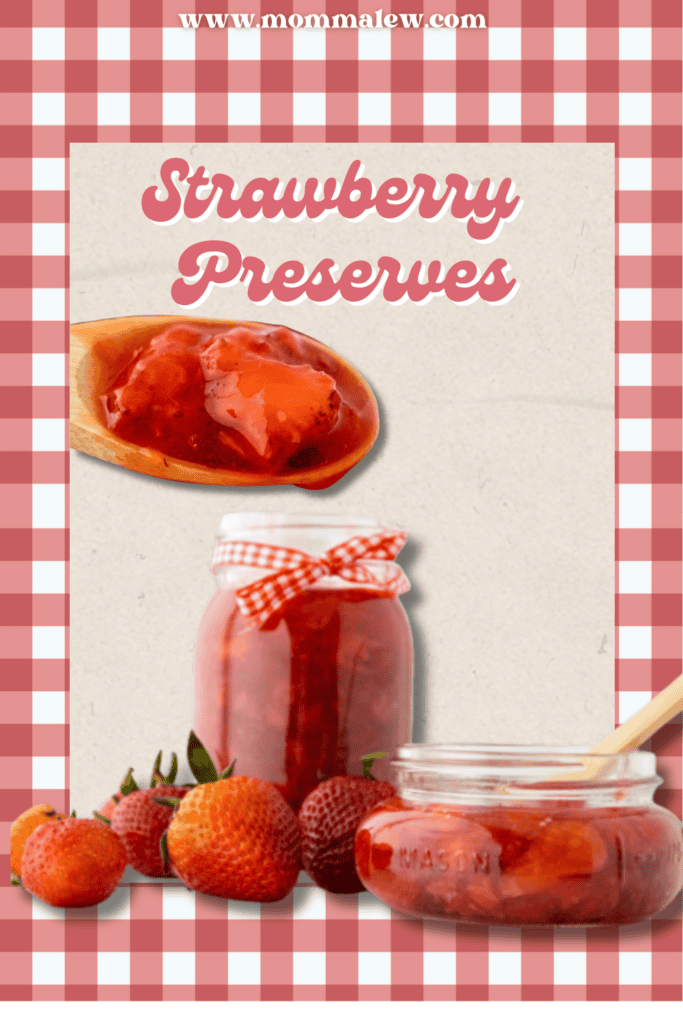
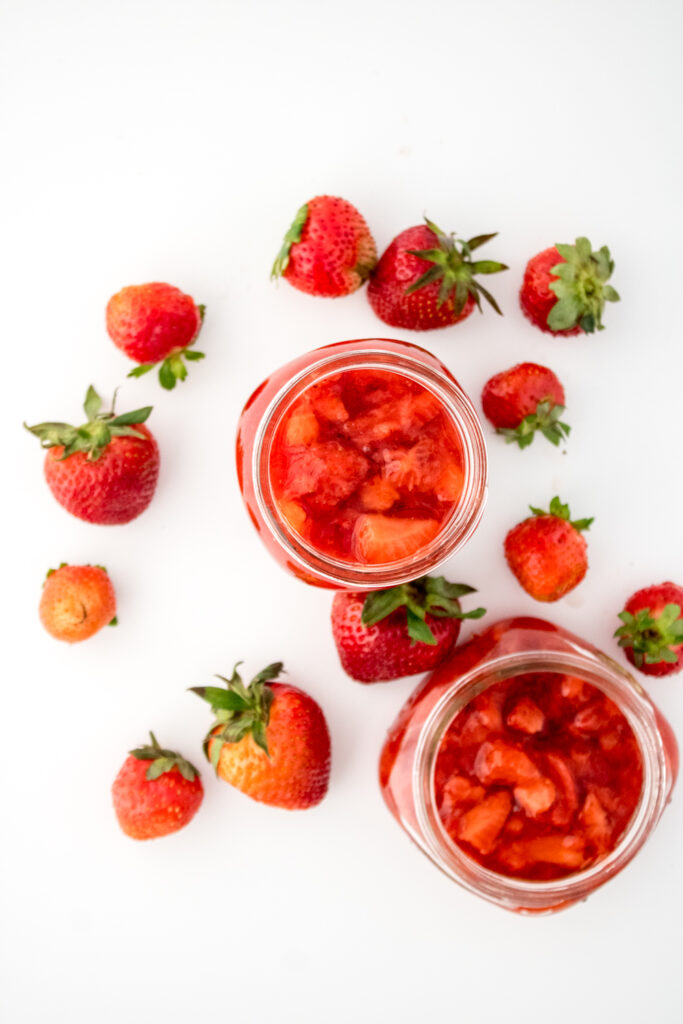
Strawberry Preserves
This Strawberry Preserve Recipe is for anyone who’s ever thought, this sounds way harder than it needs to be.
Learn how to make a homemade jam recipe that actually works—no fancy tools, no complicated steps, and no stress if you’ve never done this before.
This is one of those kitchen staples that work just as well for simple breakfasts as they do for desserts and entertaining.
You’ll learn how to get great flavor from fresh strawberries without overthinking it, plus how to tell when your preserves are ready without second-guessing yourself.
It’s meant to feel doable, not overwhelming—so you can actually enjoy the process and end up with something homemade you’re proud to spoon onto toast, swirl into yogurt, or share with family.
As an Amazon Associate, I earn from qualifying purchases. This post may contain affiliate links, meaning I may receive a small commission at no extra cost to you when you make a purchase through my links. Thank you for supporting my kitchen!
How to make strawberry preserves at home?
- Start by washing and sterilizing your jars, lids, and bands in boiling water.
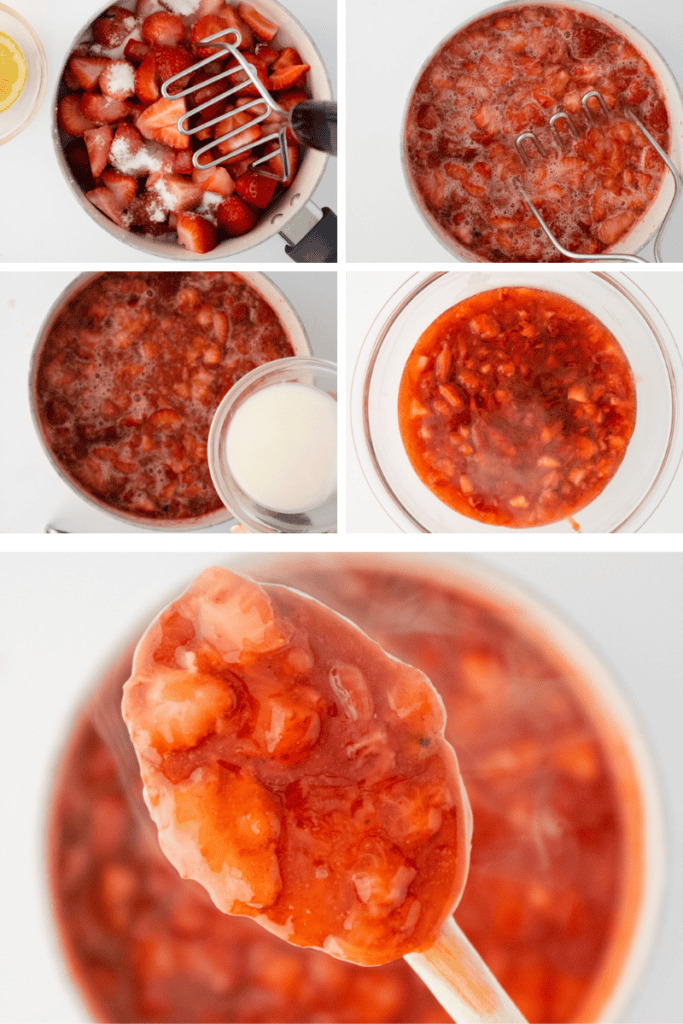
- While the jars are sterilizing, combine fresh strawberries, sugar, and lemon juice in a large pot.
- Bring the mixture to a rolling boil, gently mashing the berries to your preference as they soften. For chunkier preserves, mash lightly. For a smoother texture, mash more or use an immersion blender briefly.
- Once boiling, lower the heat slightly and stir in a cornstarch slurry to thicken the preserves, stirring frequently as it cooks for a few more minutes. Don’t rush the boil. A full rolling boil helps the fruit release juices and develop flavor before thickening.
- After thickening, let the preserves cool briefly. Check thickness early. The preserves will continue to thicken as they cool, so avoid overcooking.
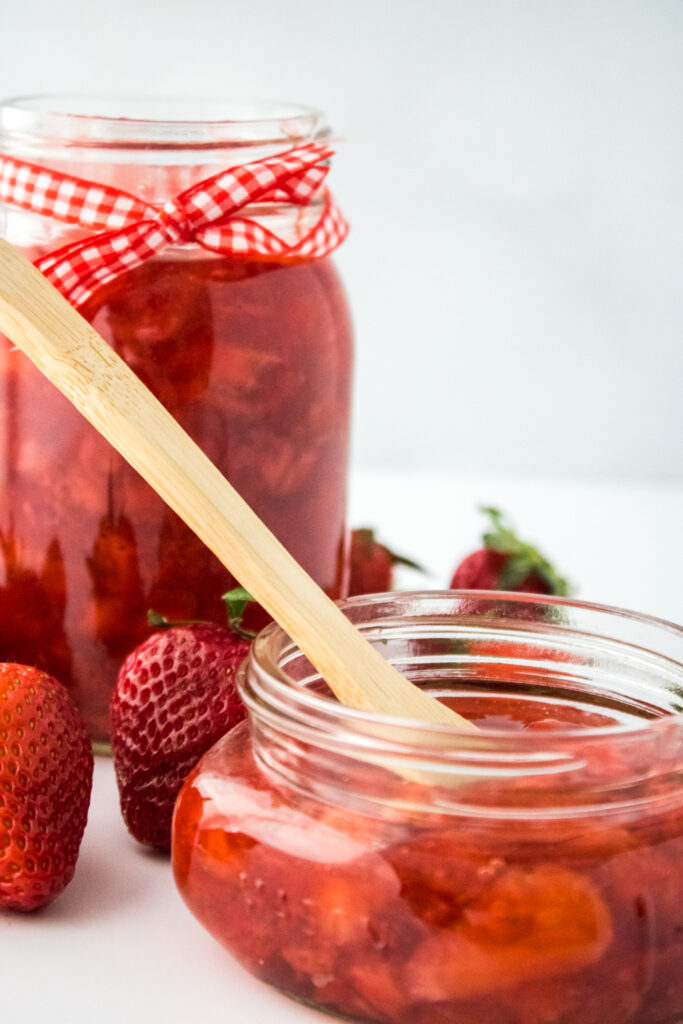
- Then ladle them into the sterilized jars, leaving a little space at the top.
Wipe the rims clean, seal with lids and bands, and process the jars in a water bath for 15 minutes. - Let the jars cool completely, then check the seals. Properly sealed jars can be stored, while any unsealed ones should be refrigerated and used soon.
Don’t Forget To…
- Scroll down to print the full recipe with step-by-step instructions and exact measurements.
- Check out my Kitchen Essentials for the pans, mixing bowls, and baking tools I use to make this recipe a breeze.
- Save or share this recipe on Pinterest!
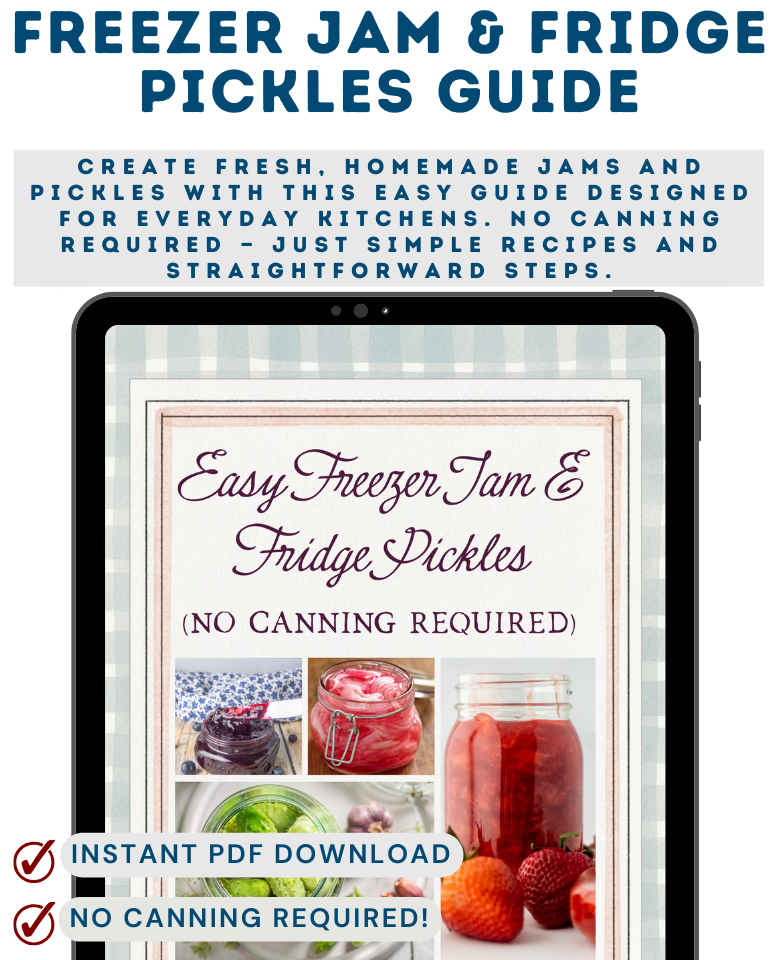
Want more easy recipes like this? Grab my Freezer Jam & Fridge Pickles Guide—no canning required!
Properly sealed jars can be stored in a cool, dark place for up to a year. Once opened, refrigerate and use within 2–3 weeks.
They may need more cooking time or additional cooling. Preserves thicken significantly as they cool.
They were likely cooked a bit too long or had too much thickener. You can gently reheat and stir in a small amount of water to loosen them.
The main difference comes down to texture. Strawberry jam is made with crushed or puréed fruit, giving it a smoother, more spreadable consistency. Strawberry preserves are chunkier, with larger pieces of fruit left intact, so you get more bite and visible strawberry pieces in every spoonful.
You only need to water bath strawberry preserves if you want to store them at room temperature. Water bath canning helps seal the jars properly and makes them shelf-stable. If you plan to keep the preserves in the refrigerator and use them within a few weeks, you can skip the water bath step and store them chilled instead.
How to Use Strawberry Preserves
- Spread it on breakfast recipes like toast, English muffins, bagels, or homemade biscuits.
- Swirl into yogurt or your favorite oatmeal recipe for quick flavor without extra sweeteners.
- Top pancakes or waffles instead of syrup, or mix with a little warm butter for an easy sauce.
- Use as a filling for thumbprint cookies, hand pies, layer cakes, cupcakes, or sandwich cookies.
- Add to dessert recipes by spooning over cheesecake, ice cream, or pound cake.
- Make a quick glaze by warming preserves with a splash of water or lemon juice for pastries or fruit tarts.
- Stir into drinks like lemonade, iced tea, or mocktails for a fruity twist.
- Upgrade savory dishes by using a small amount in pan sauces, vinaigrettes, or as a glaze for chicken or pork.
- Spread on peanut butter sandwiches for a classic PB&J upgrade.
- Gift it in small jars with a handwritten label for holidays, host gifts, or thank-yous.

If you’re loving the sweet, fruity flavor in this recipe, you’ll definitely want to check out these great ideas too—they’re perfect for making the most of fresh berries in easy, everyday ways.
- Quick Bread Recipes are a great option when you want something homemade without a lot of prep, and many of them pair perfectly with a spoonful of strawberry preserves.
- Strawberry Recipes are full of fresh, seasonal flavor and include everything from simple desserts to easy treats the whole family will enjoy.
- Triple Berry Pie is a classic dessert that combines strawberries with other berries for a rich, fruit-filled pie that’s perfect for holidays, gatherings, or anytime you’re craving something special.
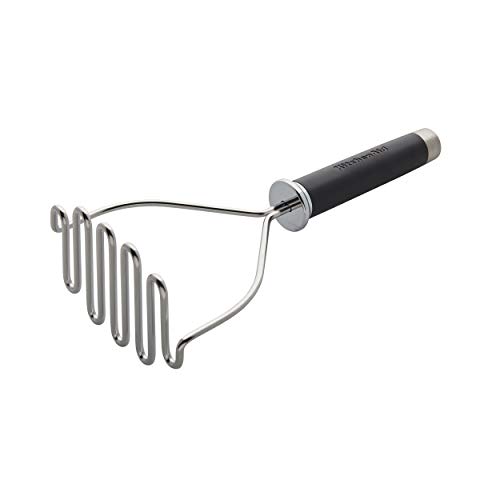
KitchenAid Gourmet Stainless Steel Wire Masher, 10.24-Inch, BlackOXO Good Grips 3-Piece Wooden Spoon Set
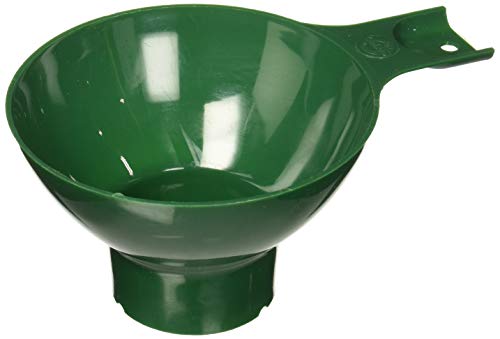
Norpro Wide Mouth Plastic Funnel, Green
PrepWorks Canning Funnel for Easy, Mess-Free Canning and Pouring into Jars
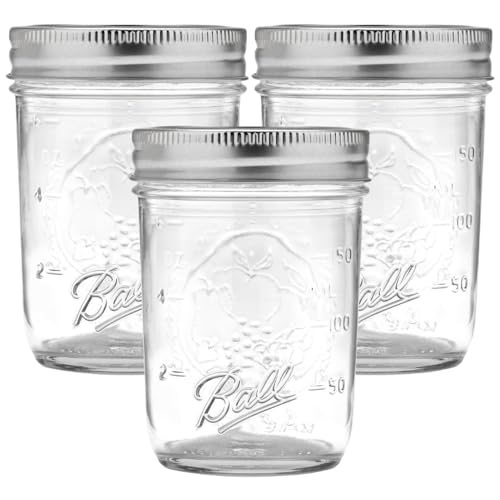
Ball Regular Mouth Glass Mason Jars with Lids and Bands, Used for Canning (Half Pint, 8 Ounce (Pack of 3))
SallyFashion 200pcs Gift Tags with String Attached, 1.7 x 2.8 inch Kraft Paper Hang Handmade Tags for Clothes Birthday Wedding Holiday DIY Crafts (Brown Water Ripple


How to Make Strawberry Preserves
Ingredients
- 4 packed cups fresh strawberries hulled & cut in half
- 1 cup of sugar
- ½ lemon juiced or ¼ cup lemon juice
- 2 tablespoons cornstarch
- 2 tablespoons cold water
Instructions
- Wash the canning jars, lids, and bands in hot, soapy water. Rinse thoroughly.
- Place the jars in a large pot filled with water, ensuring they are fully submerged.
- Bring the water to a boil and let the jars boil for 10 minutes to sterilize them. Keep the lids and bands in simmering water until ready to use.
- Place strawberries in a large stock pot, add sugar, and fresh lemon juice
- Mash the berries (if they are too hard, wait to mash them)
- Bring mixture to a full rolling boil over high heat and every so often mash the berries with a potato masher.
- Once it’s boiling and you’ve mashed the berries, turn the down to medium high and add the corn starch slurry (corn starch plus water).
- It will begin to thicken quickly, so do not take your eye off it.
- Let cook for 5-6 min continuing to stir every minute or so.
- Pour into a large bowl and let cool for 30-45 min at room temperature
- Using a funnel, carefully ladle the strawberry preserves into the sterilized jars, leaving about ¼ inch of headspace at the top.
- With a clean, damp cloth or paper towel, wipe the rims of the jars to remove any residue or stickiness.
- Remove the lids from the simmering water and place them on top of the filled jars. Screw the bands onto the jars.
- Place the filled jars into back into the water bath. Ensure that the jars are fully submerged in water, with at least 1 inch headspace of water covering the tops. Bring the water to a gentle boil and process the jars for 15 minutes.
- Carefully remove the processed jars from the boiling water and place them on a clean towel or cooling rack. Allow the jelly jars to cool undisturbed for 12-24 hours.
- Once the jars have cooled, check the seals by pressing down on the center of the lid. If the lid is firm and doesn't flex, the jar is sealed properly. Any unsealed jars should be refrigerated and used promptly.
7 Comments