Instant Pot Yogurt Recipe
If you’ve ever wanted to make Instant Pot Yogurt at home but felt unsure about the process, you’re not alone.
Between confusing temperatures, long wait times, and questions about whether it’s really worth the effort, yogurt-making can feel more complicated than it needs to be.
The good news is that your Instant Pot simplifies the entire process, turning a hands-off kitchen task into something totally doable—even on a busy day.
This instant pot recipe will have you feeling confident to make your own first batch!

Can I use my Instant Pot as a yogurt maker?
Yes! If your Instant Pot has a Yogurt button, that setting does all the hard work for you by keeping everything warm while the yogurt sets—kind of like a hands-off helper in the kitchen.
You don’t need a separate yogurt maker or any fancy tools, and there’s no babysitting involved. Once everything is in the pot, you can pretty much walk away and let it do its thing.

How to Make Yogurt in the Instant Pot
- Start with whole milk and a small amount starter. Use plain yogurt with live cultures for your starter. Check the label to make sure it says “live and active cultures” or the yogurt won’t set.
- Heat the milk using the Yogurt setting on Boil, then let it cool until warm.
- Don’t skip cooling the milk. Adding the starter when the milk is too hot can kill the cultures.
- Once cooled, whisk in the yogurt starter to introduce the cultures.
- Return the liner to the Instant Pot, set the Yogurt function again, and let it incubate for several hours until it thickens—the longer it sits, the tangier it will be.
- Leave the lid undisturbed. Opening the Instant Pot during incubation can affect the texture.
- After incubation, refrigerate the yogurt to fully set.
- For Greek-style yogurt, strain the chilled yogurt in the refrigerator for several hours or overnight to remove excess liquid. Cold yogurt strains better.
- Discard the whey, then blend if needed for a smooth, creamy texture.
- Once chilled and strained to your liking, it’s ready to enjoy.
Don’t Forget To…
- Scroll down to print the full recipe with step-by-step instructions and exact measurements.
- Check out my Kitchen Essentials for the pans, mixing bowls, and baking tools I use to make this recipe a breeze.
- Save or share this recipe on Pinterest!

This usually happens if the milk was too hot or too cold when the starter was added, or if the yogurt starter didn’t contain live cultures.
That liquid is whey. It’s completely normal and can be stirred back in or strained off.
No, you don’t need to fully sterilize it. Just make sure your Instant Pot insert, lid, and utensils are clean. Running the insert through the dishwasher or washing it well with hot, soapy water is more than enough.
Yes, but it’s a bit trickier. You can use the Sauté function to heat the milk and then keep it warm using a low-heat method like the oven with the light on or wrapping the pot in towels. An Instant Pot with a yogurt button is much easier, but it’s still possible without one.
Whole milk is the best choice for thick, creamy yogurt. You can use 2% or skim milk, but the yogurt will be thinner and may need straining to get a thicker texture.
Stored in an airtight container in the refrigerator, Instant Pot yogurt stays fresh for up to 10 days. Always use a clean spoon when serving to help it last longer.
It takes time, but most of it is hands-off. Plan for about 10–15 hours total from start to finish. Heating the milk and letting it cool takes roughly 1 to 1½ hours, and the yogurt then needs 8–12 hours to incubate, depending on how tangy you like it. After that, it should chill in the refrigerator for at least 4 hours to fully set.

Tips for Flavoring Homemade Yogurt
- If you’re adding thicker ingredients like peanut butter or fruit puree, a quick blend helps keep the texture creamy.
- Wait until after it’s done. Always flavor yogurt after it has finished incubating and chilling. Adding sweeteners or mix-ins too early can interfere with the culturing process.
- Start simple. Honey, maple syrup, or vanilla extract are easy ways to add flavor without overpowering the yogurt. Stir in a little at a time and taste as you go.
- Use jam or fruit preserves for quick flavor. Swirling in a spoonful of strawberry preserves, blueberry jam, or raspberry jam adds sweetness and fruit flavor without extra prep.
- Fresh fruit goes in last. Add chopped fruit right before serving to keep it from getting watery. If you want fruit mixed in ahead of time, cook it down slightly to remove excess moisture.
- Sweeten individual portions. Instead of flavoring the whole batch, keep it plain and let everyone customize their own bowl.
- Go savory if you want. Plain yogurt works great with salt, herbs, garlic, or lemon juice for dips, sauces, or marinades.
Instant Pot Pro (8 QT) 10-in-1 Pressure Cooker, Slow Cooker, Rice/Grain Cooker, Steamer, Sauté, Sous Vide, Yogurt Maker, Sterilizer, and Warmer, Includes App With Over 800 Recipes, BlackInstant Pot Stainless Steel Inner Cooking Pot with Handles, 6-Qt, Polished Surface, Use with 6-Qt Duo Evo, Pro & ProPlus
AYMDKI Meat Thermometer Digital – Instant Read Food Thermometer for Cooking Grilling, Candy, Air Fryer, Griddle Probe Kitchen Gadgets Essentials BBQ Accessories, Gifts for Him, Red
OXO Good Grips 2-Cup Angled Measuring Cup
Cotton Farm Pre-Cut Cheese Cloths, 18 x 18 inch, Grade 100, Overlocked Edges, Ready to Use, Muslin Cheesecloth for Straining and Cooking, 100% Unbleached Cotton, Reusable
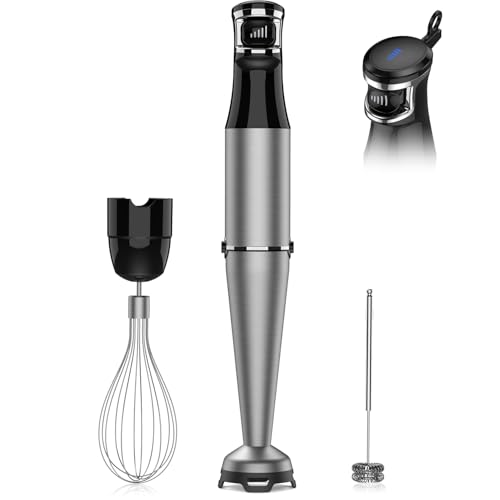
Immersion Blender Handheld 1100W – 3 in 1 Hand Blenders Set with Trigger Speed Control Stainless Steel Emulsion Stick with Whisk and Milk Frother, Emulsifier for Kitchen for Soup, Smoothie, Puree
NETANY 4-pack 16oz Glass jars with Airtight Lids, Overnight Oats Containers with Bamboo Lids, Wide mouth Mason Salad jars, Glass Food Storage Containers for Snacks Yogurt Spice Sugar


- Frozen Yogurt Bark is a fun, no-bake option that’s easy to customize with fruit, chocolate, or sprinkles for a cool treat any time of year.
- Homemade Granola pairs perfectly with yogurt for an easy breakfast recipe or snack, adding just the right amount of crunch and flavor.


Instant Pot Yogurt Recipe
Ingredients
- 8 cups whole milk
- ¼ cup plain whole milk yogurt or yogurt starter
Instructions
- Add your milk to your Instant Pot, select the Yogurt function. Select ‘Adjust’ until the screen says ‘boiL.”
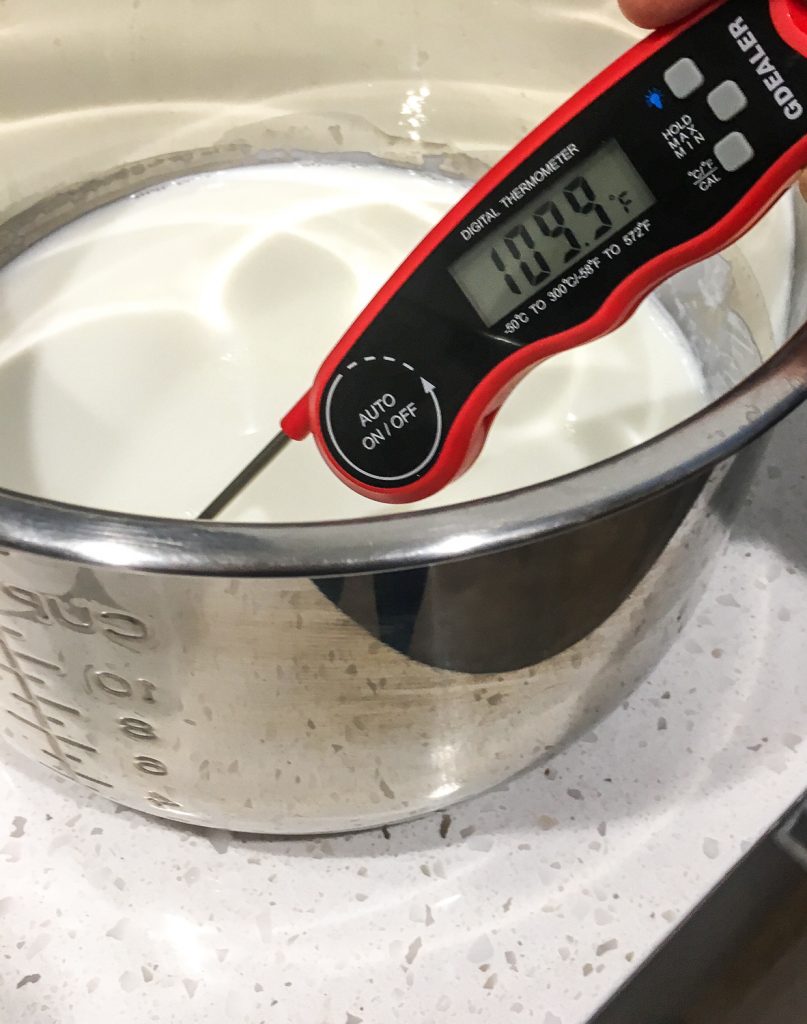
- Add lid and wait until the unit beeps to indicate it is finished boiling. The screen will say “YoGt” when done. Insert instant read thermometer into the milk to ensure it has reached at least 180°F.
- Turn unit off and remove pot to allow milk to cool. For quicker results, place pot in a tub of cold water or leave on the counter to cool naturally.
- When an instant read thermometer reads 110°F, the milk is cool enough, remove about a cup of the milk from the pot and stir the yogurt starter or 1/4 cup plain whole milk yogurt together before pouring into the rest of milk in the pot.
- Return pot to unit and cover with the lid (no need to seal for this function). Select the ‘Yogurt’ function again and make sure the setting is on “Normal’ (NOT “Low” – very important!) and adjust time for 8-10 hours. The longer the incubation period, the tangier the yogurt will be.
- When the yogurt is done incubating, remove the lid and turn unit off. Line a strainer with some cheesecloth and place over a large bowl.
- Pour yogurt into the strainer and place in the refrigerator to strain for several hours to overnight. The longer the yogurt is allowed to strain, the thicker the yogurt will be.
- Once yogurt is strained, discard the liquid whey (or save to use in smoothies) and transfer the yogurt to a bowl.
- If the yogurt texture is lumpy, process with an immersion blender or hand mixer until creamy and smooth.
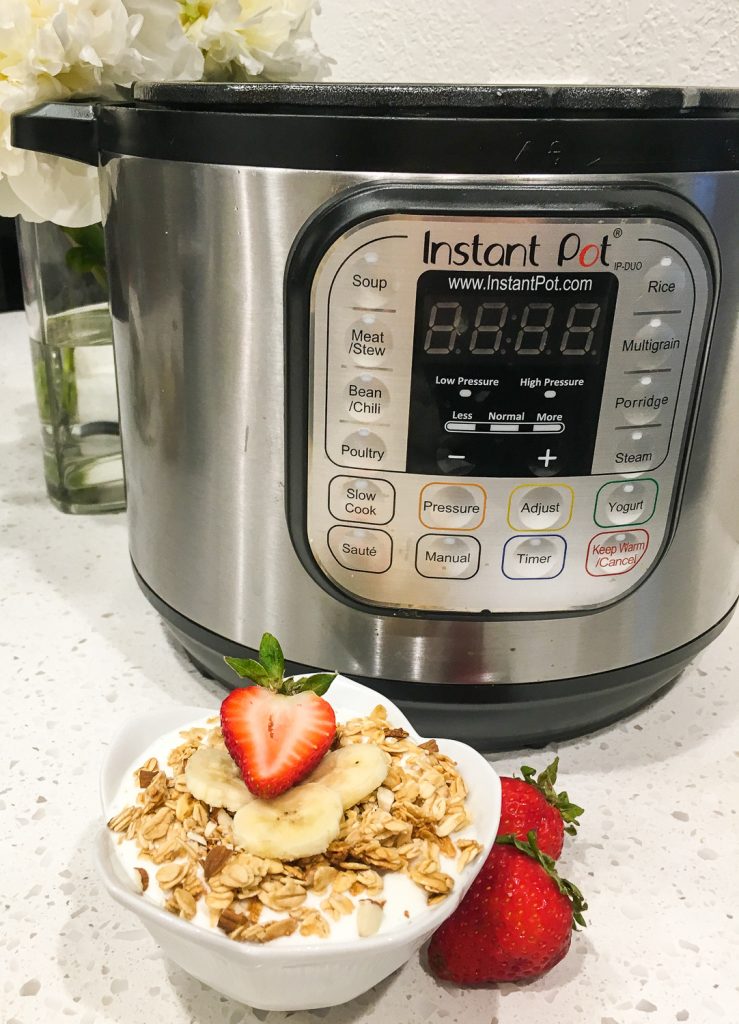
- Serve immediately topped with fresh fruit, granola, and a drizzle of honey, if desired, or store in an airtight container in the refrigerator for several days.
5 Comments