Easter Chocolate Covered Oreos
Easter Chocolate Covered Oreos are one of those treats that look bakery-level beautiful but are surprisingly simple to make at home.
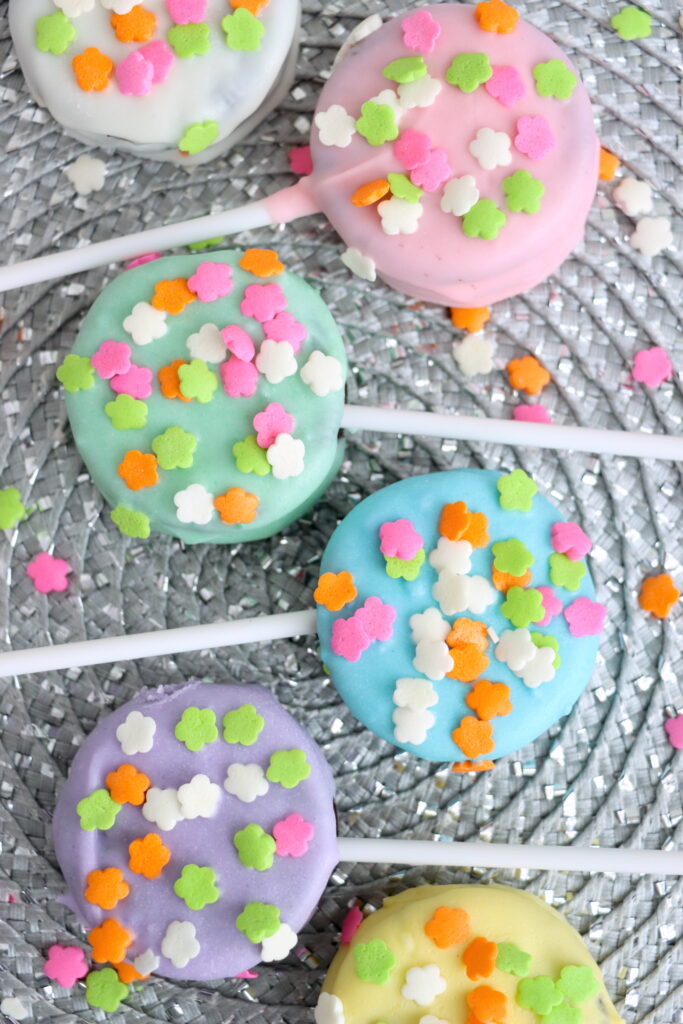
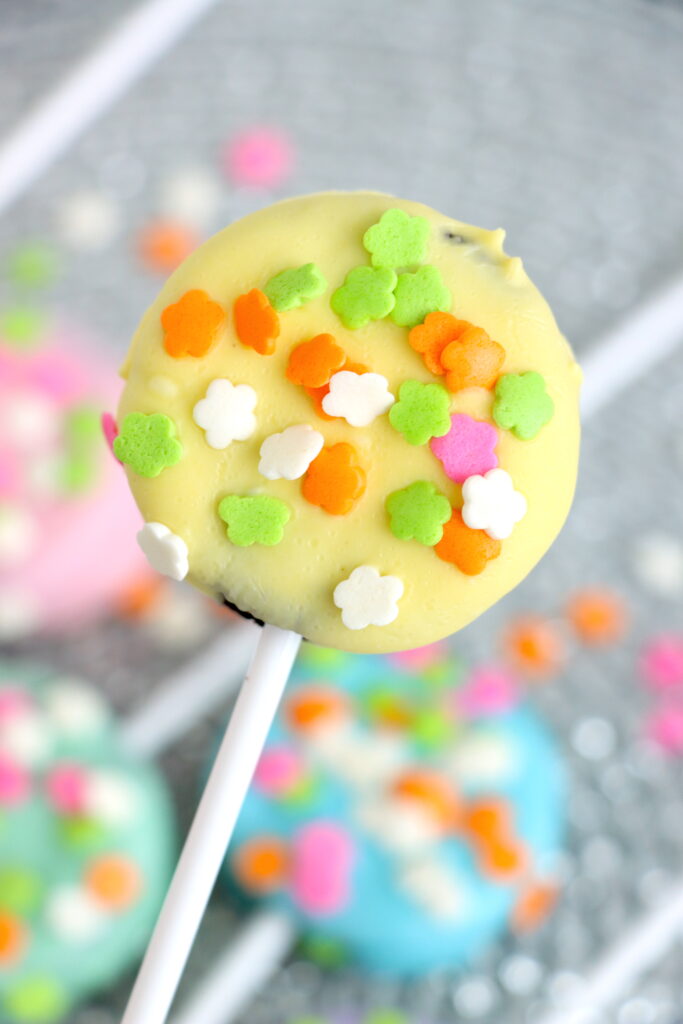
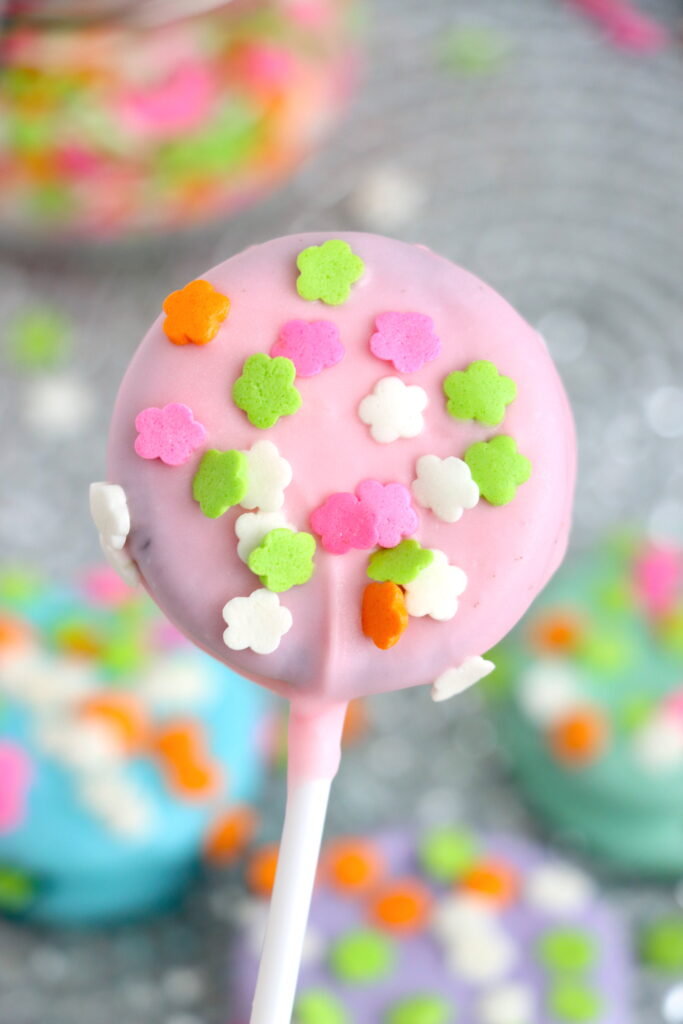
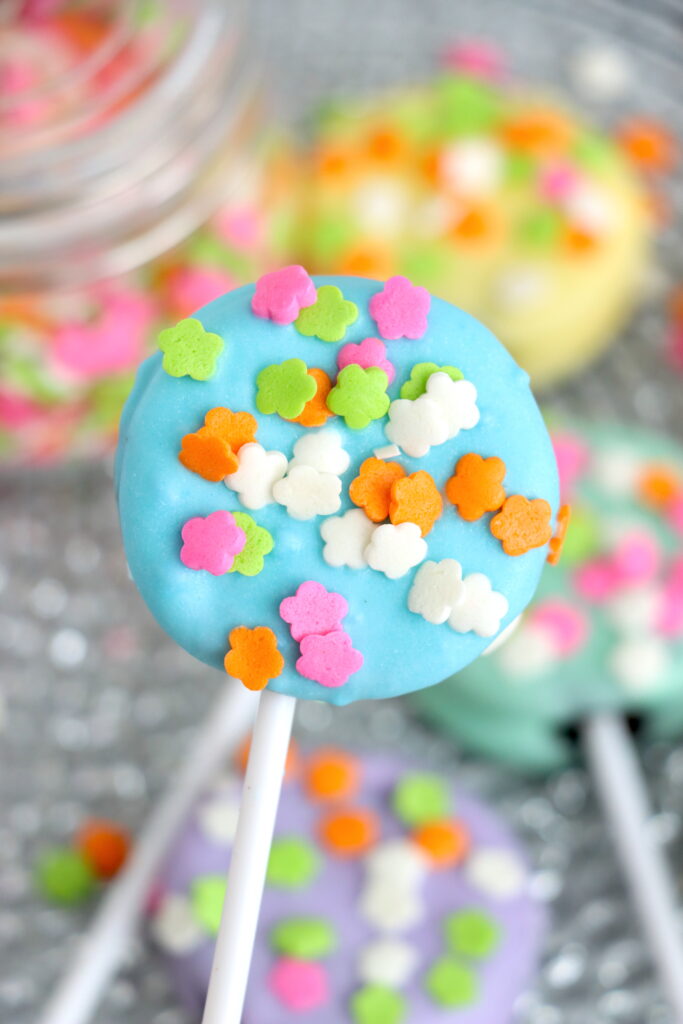
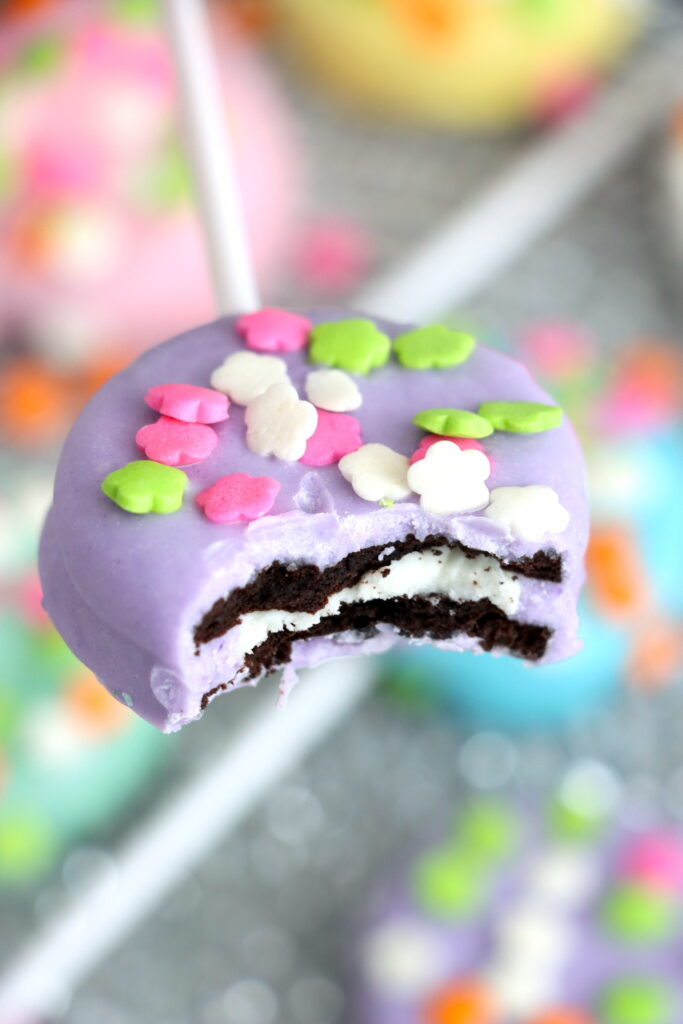
Dipped in creamy melted chocolate and decorated with pastel colors, festive sprinkles, or candy drizzle, they instantly brighten up any Easter dessert table.
They’re perfect for filling Easter baskets, wrapping up as edible gifts, or serving at spring parties and school celebrations.
Since they’re completely no-bake, they come together quickly and are easy enough to make with kids.

As an Amazon Associate, I earn from qualifying purchases. This post may contain affiliate links, meaning I may receive a small commission at no extra cost to you when you make a purchase through my links. Thank you for supporting my kitchen!
How to Make Chocolate Covered Oreos
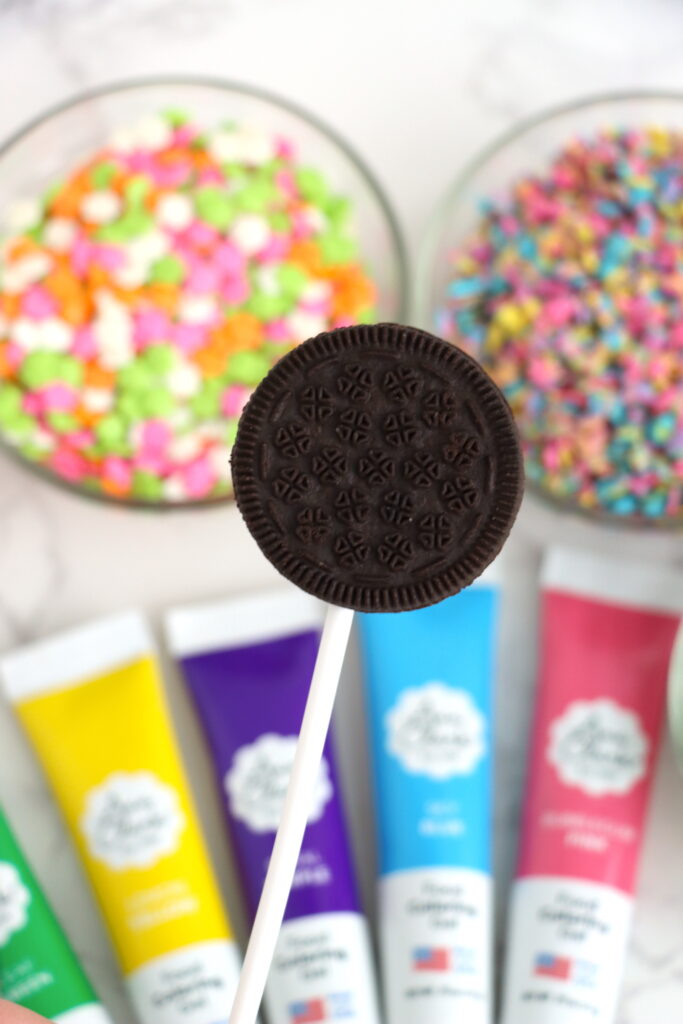
- Start by lining a baking sheet with parchment paper and gathering everything you’ll need. (Tip: Prep all your sprinkles and colored melts ahead of time so you can decorate quickly before the chocolate sets.)
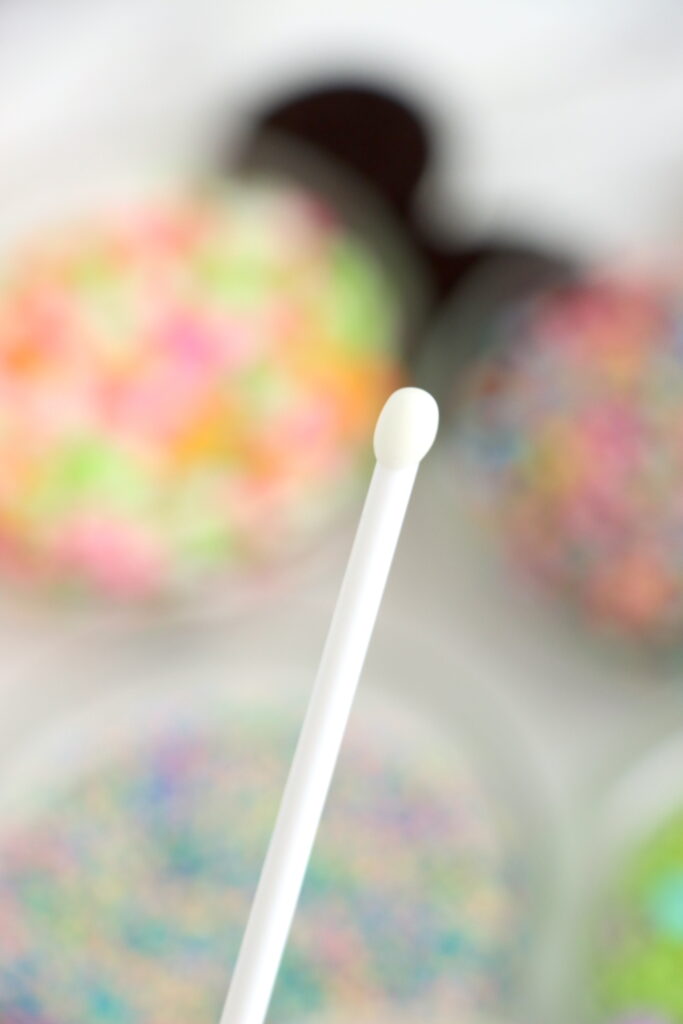
- Melt a small amount of white bark and dip one end of each cake pop stick into the melted chocolate before inserting it into the center of an Oreo. This helps “glue” the stick in place.
- Let them sit until firm — about 5–10 minutes. (Pro tip: Don’t push the stick all the way through — gently twist it into the cream filling for the best hold.)
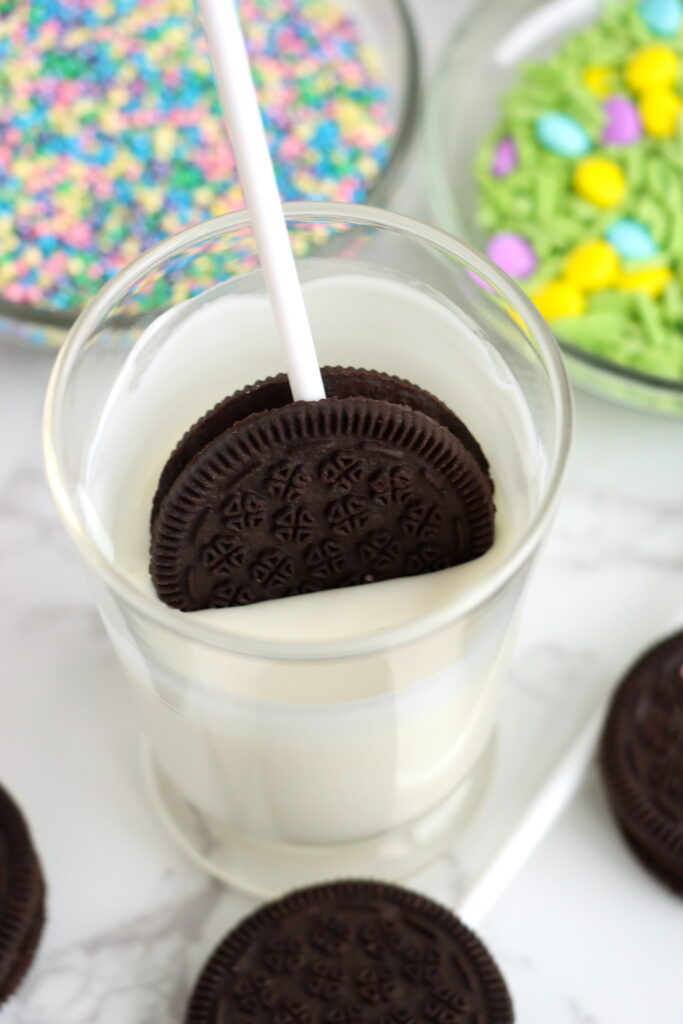
- Melt more white bark and dip several Oreos at a time, tapping gently on the side of the bowl to remove excess chocolate.
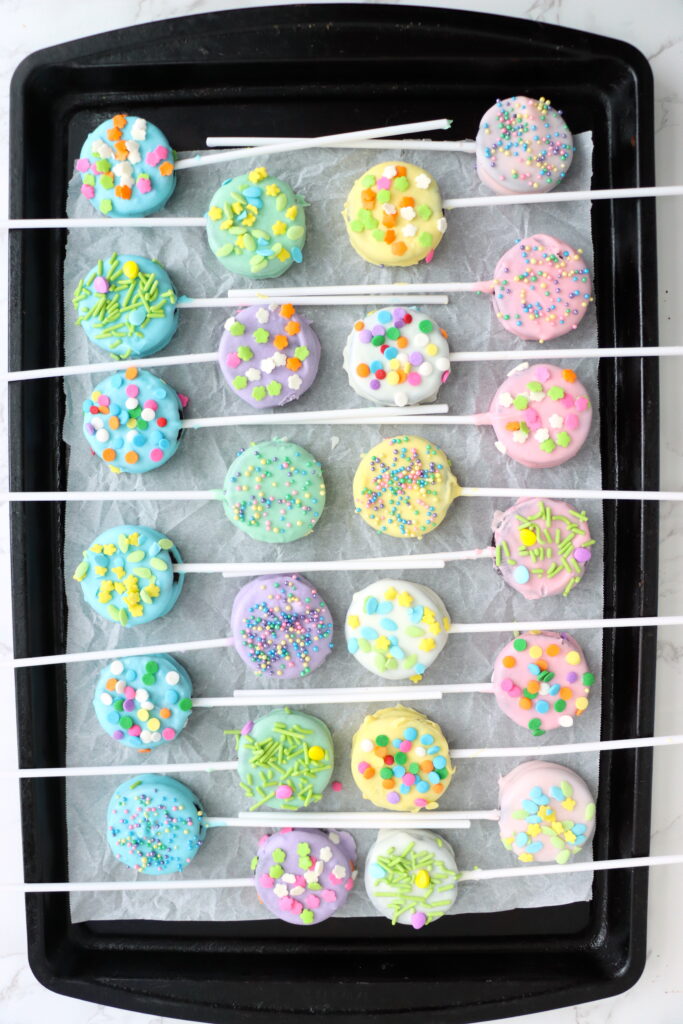
- Immediately add sprinkles before the coating sets.
- Repeat with pastel-colored melts — blue, green, pink, yellow, and purple — dipping a few Oreos per color. (Tip: Work in small batches so the chocolate stays smooth and easy to coat. If it thickens, reheat in short 15-second bursts.)
- Let the dipped Oreos chill for about 20 minutes, or until the coating is fully set. Once hardened, carefully remove them from the baking sheet.
- Store the Oreos in an airtight container, separating layers with parchment paper to prevent sticking.
Yes, although it’s usually not necessary since they store well at room temperature. If you do freeze them, allow the chocolate to fully set first, then place them in a single layer in an airtight container with parchment paper between layers. They can be frozen for up to 2 months. Let them thaw at room temperature inside the sealed container to prevent condensation and chocolate streaking.
Chocolate covered Oreos can be made 1–2 weeks in advance. Store them in an airtight container in a cool, dry place. Because Oreos are shelf-stable, they stay fresh and crisp after being coated. For parties or holidays like Easter, making them 3–5 days ahead is ideal.
Candy melts or melting wafers are the easiest option because they melt smoothly, set quickly, and come in festive colors. Almond bark is another great choice since it’s budget-friendly and doesn’t require tempering. If you prefer a richer flavor, high-quality white or semi-sweet chocolate works well, but it requires more careful melting for the best results.
For best results, I recommend using good-quality candy melts like these and festive Easter sprinkles like these.
Wilton White Candy Melts, 12-Ounce Wilton Pink Candy Melts Candy, 12 oz.Wilton Yellow Candy Melts, 12-OunceLight Blue Chocolate Melting Wafers, 12 Ounce Bulk Bag, Light Blue Chocolate, Light Blue Candy, Melting Chocolate Candy Discs For Baking, Dipping, Decorating – The Hampton Popcorn & Candy CompanyLight Green Chocolate Melting Wafers 1LB – Smooth and Creamy, Perfect for Dipping, Baking, Candy Making, and Decorating Desserts – Ideal for Fountains, Coating, and Molded Chocolates (1 pound) (Light Green)Sweets Indeed Easter 6 Cell Sprinkle Set – 6.45 ounces Edible Decorative Sprinkles for Baking, Cake Decorating, Cupcakes, Cookies & Desserts – Festive Spring Easter Sugar Decorations


Candy dipping tools make coating smoother and less messy.
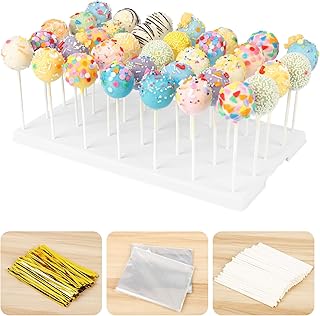
600Pcs Lollipop Stick, 6IN Cake Pop Sticks with Clear Treat Bags & Gold Twist Ties, Cake Pops Making Tools for Lollipops, Candies, Chocolates CookiesAmazon Basics Silicone Rectangular Baking Mat, Non-Stick, Reusable, Dishwasher Safe, Food Safe, Heat Resistant, 16.5Cake Pop Display Stand Holder, 35 Holes with 100 Pcs Sticks, Bags, Gold Ties – Essential Kit for Cakepop & Lollipop (White)


Don’t Forget To…
- Scroll down to print the full recipe with step-by-step instructions and exact measurements.
- Check out my Kitchen Essentials for the pans, mixing bowls, and baking tools I use to make this recipe a breeze.
- Save or share this recipe on Pinterest!
300pcs Cake Pops Set, 100pcs 6 Inch Lollipop Sticks, 100pcs Cake Pops Bags, 100Pcs Pink Metal Twist Ties for DIY Lollipops, CakePops, Candy, Chocolate Making Tools GHIRARDELLI White Vanilla Flavored Melting Wafers, 10 OZ BagGel Food Coloring – 15 Colors Flavorless Gel Based Food Color Dye, Vibrant Edible Concentrated Food Coloring for Cake Cookie Decorating, Easter Egg, Icing, Fondant, Baking, Macaron (6g/Bottle) – VeganMystic Sprinkles Spring Sprinkle Mixes (Dainty Daisy Confetti Mix 2.6oz)


Don’t stop at just one treat—give these a try too! There are so many fun and delicious ways to enjoy Oreos and other delicious dessert recipes, so why not make a few?
- Wondering can you freeze Oreos? The answer is yes! Freezing them keeps them fresh for later snacking or baking. Try it and see how easy it is!
- Love Oreos? Try these recipes using Oreo cookies for fun and easy treats everyone will love! From cakes to truffles, there’s something for every sweet tooth.
- Craving more easy treats? Find more no bake desserts like Easter fudge and satisfy your sweet tooth without turning on the oven!


Easter Chocolate Dipped Oreos
Ingredients
- 14.3 oz package Oreos mine had 36 Oreos in it
- 24 oz white bark or white chocolate
- Spring/ Pastel Food Coloring
- Spring sprinkles
- 36 cake pop sticks
Instructions
- Prepare a baking sheet by lining it with parchment paper. Set aside.
- In a small deep microwave-safe bowl, melt 4 oz of white bark in 30-second intervals, stirring often.
- Put a small amount of melted chocolate on the end of each stick and push them into the center of the oreos. Allow to harden.
- Dip 6 of the Oreos into the white melted bark, covering them completely.
- Tap off any excess chocolate gently to avoid removing too much of the coating.
- Place your delicious oreo treats on your prepared cookie sheet and add sprinkles.
- Melt an additional 4 oz of bark like you did the first batch. Stir in a small amount of blue food coloring gel to create a pastel blue. The amount you use will vary depending on the type of food coloring you are using.
- Dip 6 Oreos into the blue, completely covering them.
- Place the dipped oreo on the parchment paper and add sprinkles.
- Continue this with the green, pink, yellow, and purple.
- Chill your delicious oreo cookies for 20 minutes or until bark is hardened.
3 Comments