Basket Weave Cake Design
A Basket Cake Design is perfect when you want a cake that looks fancy and textured—without needing bakery-level decorating skills to pull it off.
The woven frosting pattern looks detailed and impressive, but it’s really just a simple repeat-and-layer technique once you know the rhythm.
Be sure to check out these Easter Dessert Ideas if you’re planning a spring party spread.
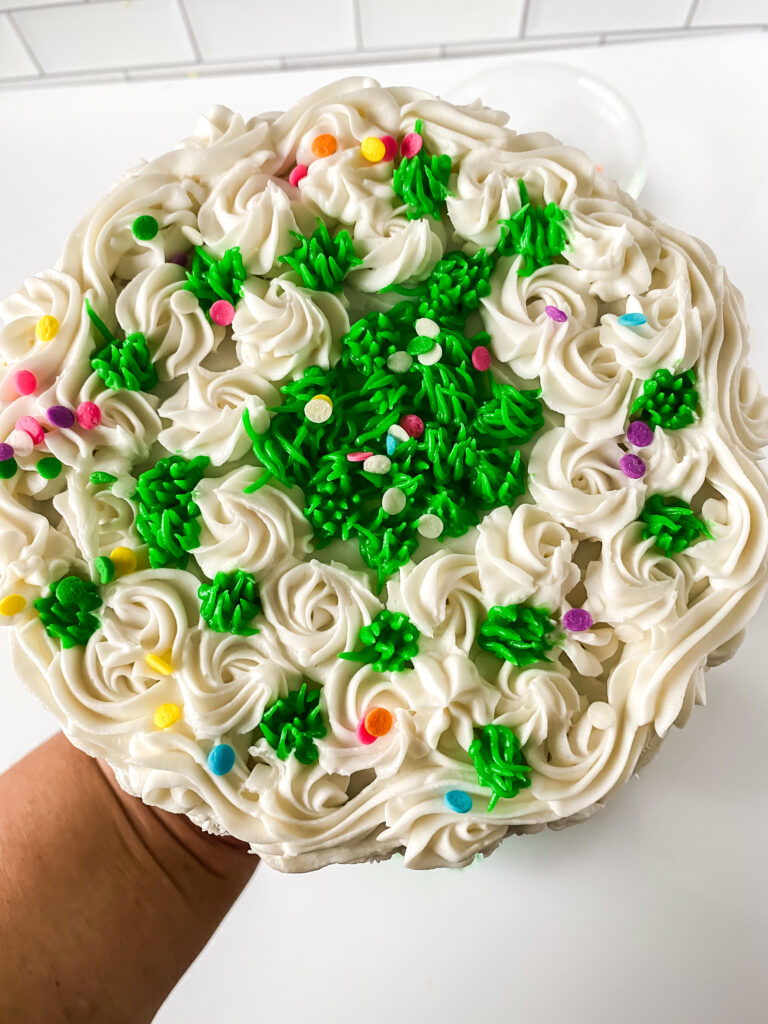
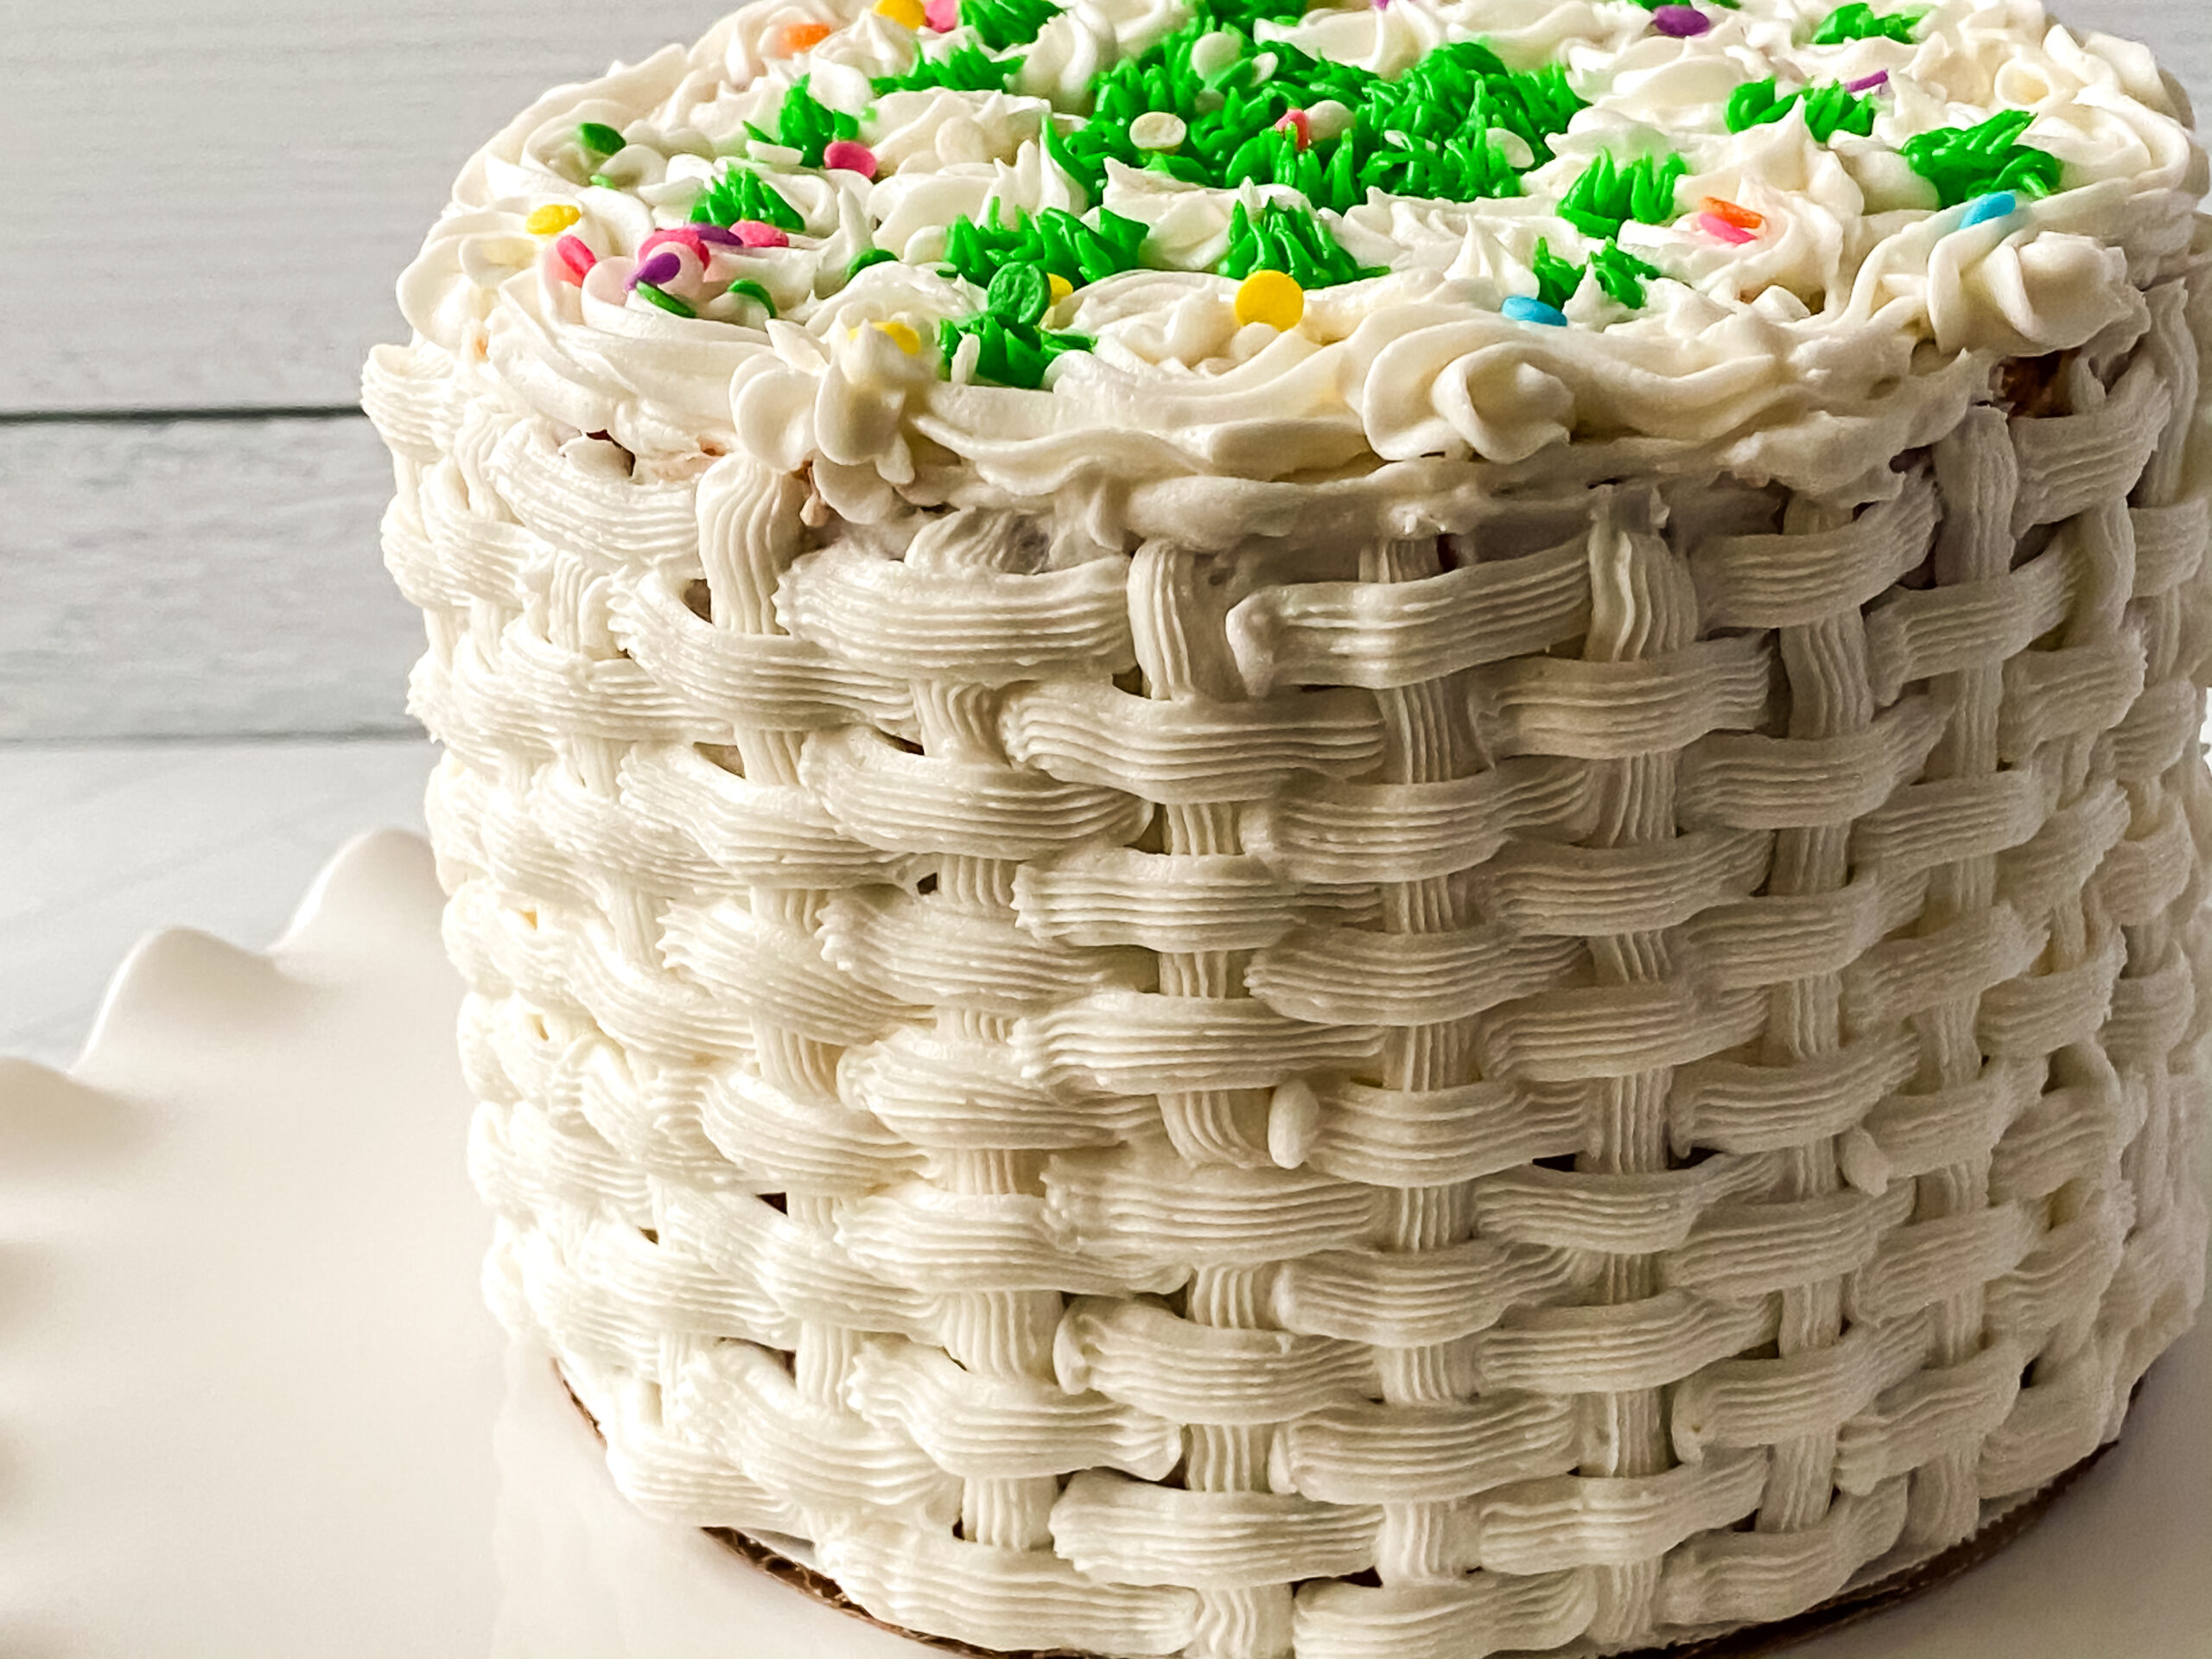
This decorating technique creates the look of an intricately woven basket using frosting, making it a perfect choice for spring celebrations, birthdays, baby showers, or anytime you want a cake that gets “oohs” before the first slice is even served.

As an Amazon Associate, I earn from qualifying purchases. This post may contain affiliate links, meaning I may receive a small commission at no extra cost to you when you make a purchase through my links. Thank you for supporting my kitchen!
How to Create a Basket Weave Cake Design
- Start by gathering all your ingredients and supplies, and make sure your cake is fully cooled (warm cake + frosting = sliding mess).
- Secure the cake to the board – Place your cake on a cake board using a small dollop of buttercream underneath to keep it from sliding.
- Add a crumb coat – Spread a thin layer of buttercream over the cake to trap crumbs, then chill the cake for 15–30 minutes to set.
- Practice first (seriously—this helps!) – Before piping on the cake, practice your weave pattern on parchment paper so you can get a feel for pressure and spacing.
- Fill your piping bag – Use a piping bag fitted with a basket weave tip (#47) and fill it with buttercream.
- Start in the back – Begin on the back of the cake so you can “warm up” before you reach the front.
- Pipe the basketweave pattern – Pipe a short vertical line, then pipe a horizontal strip across it. Keep repeating, alternating the placement of the horizontal strips to create that woven basket look.
- Continue until the cake is covered – Work your way around the cake until the basketweave pattern covers the sides completely.
- Customize your cake to match any season or celebration. Top it with icing rosettes, fresh berries, or Easter candy for a simple but stunning finishing touch.


Quick tip: If the frosting starts feeling soft, pop the piping bag into the fridge for 5–10 minutes. Basketweave looks best when the buttercream holds its ridges.
What You Need for a Basket Cake Design
Before you start piping, it helps to have everything ready to go—because once your buttercream is the right consistency, you’ll want to work without stopping too much.
Must-Have Supplies
- A baked and fully cooled cake (a layer cake or single layer both work!). Try Vanilla Layer Cake, Chocolate Cake, or Carrot Cake recipes as your base.
- Vanilla Buttercream frosting (homemade is best for piping)
ONE MORE 30-Pack White Cake Board Rounds,Circle Cardboard Round Base 6,8 and 10 inch, Disposable Coated Cake Plate 10 of Each Size Tamodan Piping Bags 100PCS & 16 Inches Tipless Piping Bags, Extra Thick Pastry Bags Disposable, Non-Slip Icing Piping Bags Disposable Design, Cake Decoration.Wilton Decorating Tip, No.47 BasketweaveAngled Icing Spatula, Stainless Steel Offset Spatula, Cake Spatula Set of 2 Black 6, 8 inch BladeKootek Aluminium Alloy Revolving Cake Stand 12 Inch Rotating Cake Turntable for Cake, Cupcake Decorating SuppliesTeenitor Cake Scraper Cake Smoother, 7 Pcs Dough Scraper Bowl Scraper Cake Cutter Cake Spatula Bench Scraper Kitchen Plastic Scraper Tool Cake Decorating Kit


Depending on your skill level and cake size, it usually takes about 30 minutes to 1 hour.
Yes! You can decorate the cake 1–2 days in advance. Store it covered in the refrigerator, then let it sit at room temperature for about 30 minutes before serving.
If you’re feeling inspired to get even more creative in the kitchen, be sure to check out these helpful ideas to take your cake baking and decorating skills to the next level.
- My Cake Decorating Guide walks you through essential techniques, tools, and tips so you can feel confident tackling everything from smooth frosting to detailed designs.
- These Easter Cake Recipes are full of festive, colorful inspiration that’s perfect for spring celebrations, brunches, and family gatherings.
- For an extra layer of flavor, fill your cake with lemon curd or strawberry jam to add a bright, fruity surprise inside every slice.
- If you love eye-catching designs, my Drip Cake Tutorial shows you exactly how to create that glossy, bakery-style finish at home.
Basket Weave Cake Design
Ingredients
- Prebaked cake of your choice preferably frozen
- Buttercream Icing
- Basket Weave #47 Piping Tip
- Piping Bags + Coupler
Instructions
- Place one dollop of buttercream into the center of the cake board. This will serve as our “glue” for the cake.
- Place frozen cake layers onto the board and create your inside layers.
- Once the cake is put together, lightly crumb coat (do a thin layer of buttercream icing around the entire cake to capture any crumbs that can mess up the presentation).
- Place the cake into a fridge or freezer while you set up the icing.
- Place coupler in piping bag and fit with tip 47. Fill bag ½ full with buttercream icing.
- Remove cake from cooler and place on top of turntable.
- (Imagine the top of the cake is a clock) Hold the decorating bag at a 45 degree angle at 6 o’clock.
- Very lightly touch the piping tip to the crumb coated cake, serrated side up, squeeze out a vertical strip of icing from the top to the bottom of the cake. Stop squeezing and then pull away.
- For the duration of this project, remember to squeeze, stop and then pull away.
- With the bag positioned at a 45 degree angle, this time at 3 o’clock, squeeze out short horizontal stripes of icing over the vertical line starting at the top. The spacing between the horizontal stripes should be even.
- Pipe the next vertical line over the ends of the horizontal stripes.
- Begin a set of horizontal stripes by burying the tup under the previous vertical line.
- Repeat this process, with vertical and horizontal stripes until you have covered the entire cake with the basketweave pattern.
2 Comments