Rainbow Unicorn Cake
A Rainbow Unicorn Cake is one of the most magical birthday cake recipes you can make.
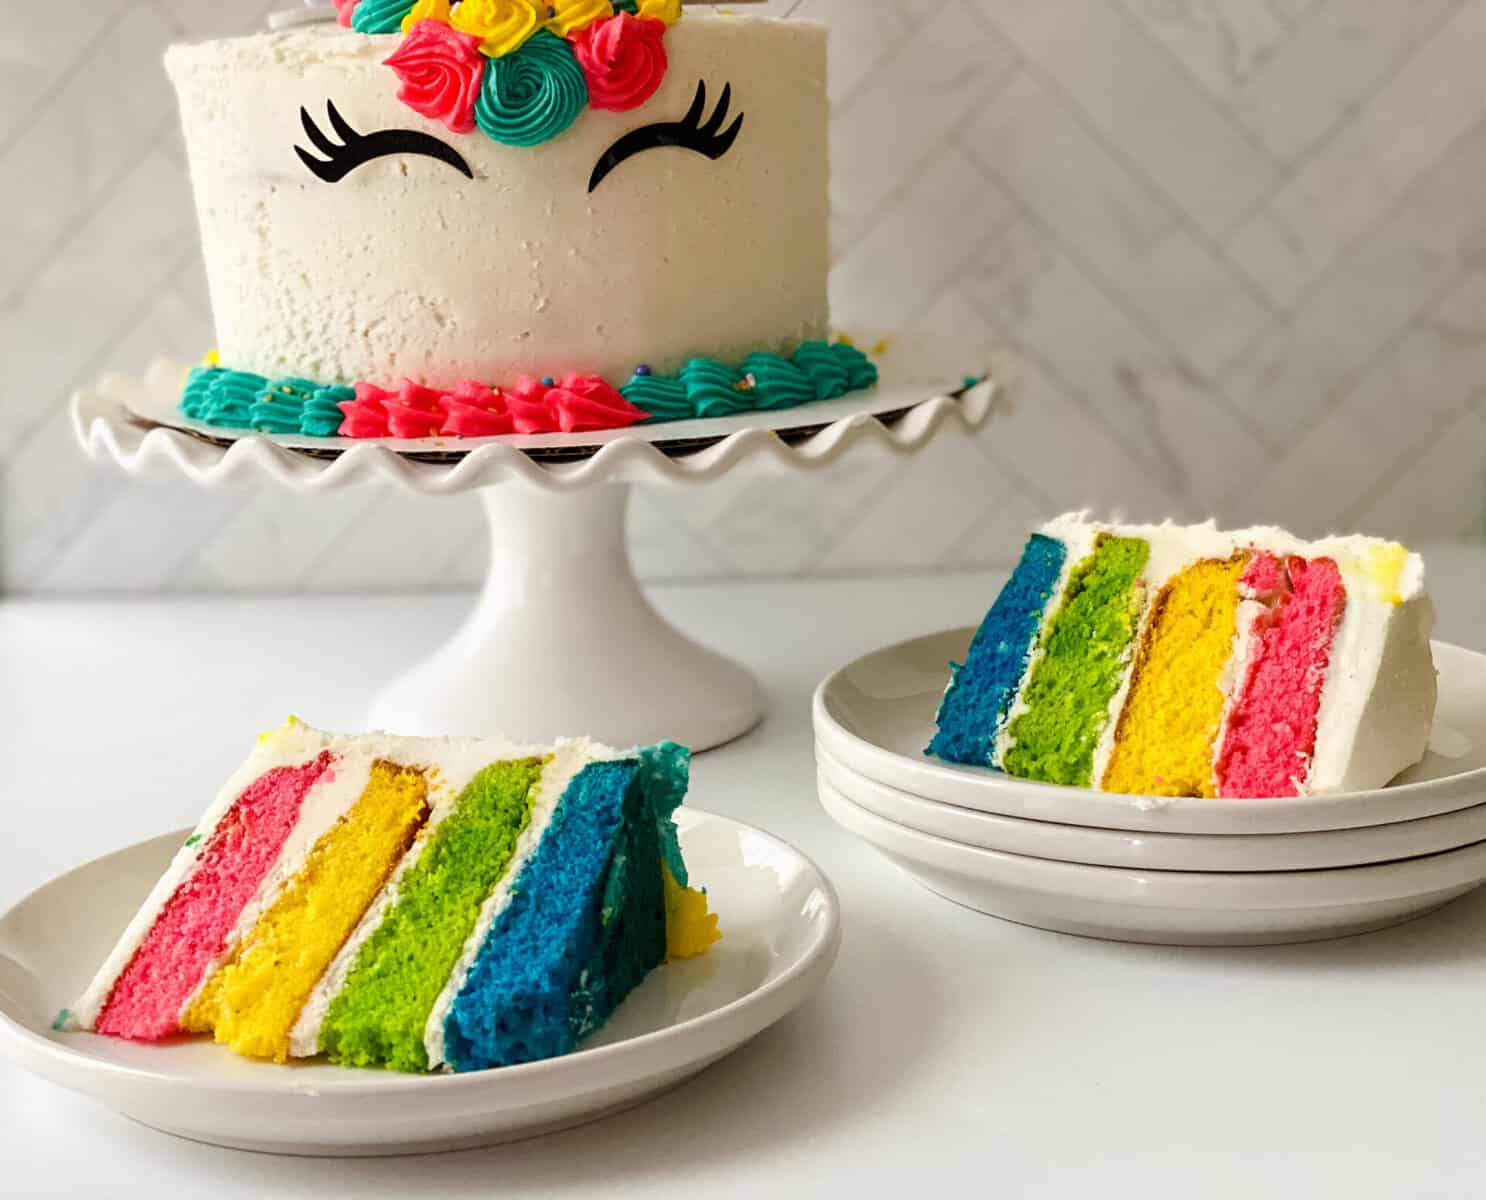
With colorful rainbow cake layers, creamy frosting, and fun unicorn decorations, this cake creates a big wow factor when it’s sliced.
The best part? You don’t need professional cake decorating skills to make it.
This easy tutorial walks you through creating a vibrant rainbow layer cake topped with a unicorn horn, ears, and colorful frosting details.
Whether you’re planning a unicorn birthday party or just want a fun baking project, this recipe is guaranteed to be a showstopper.

As an Amazon Associate, I earn from qualifying purchases. This post may contain affiliate links, meaning I may receive a small commission at no extra cost to you when you make a purchase through my links. Thank you for supporting my kitchen!
Why You’ll Love This Rainbow Unicorn Cake
- Makes a memorable celebration cake
- Perfect for unicorn-themed birthday parties
- Bright rainbow cake layers inside
- Easy enough for beginner bakers
- Can be customized with different colors
- Uses simple decorating techniques

How to Make a Unicorn Cake
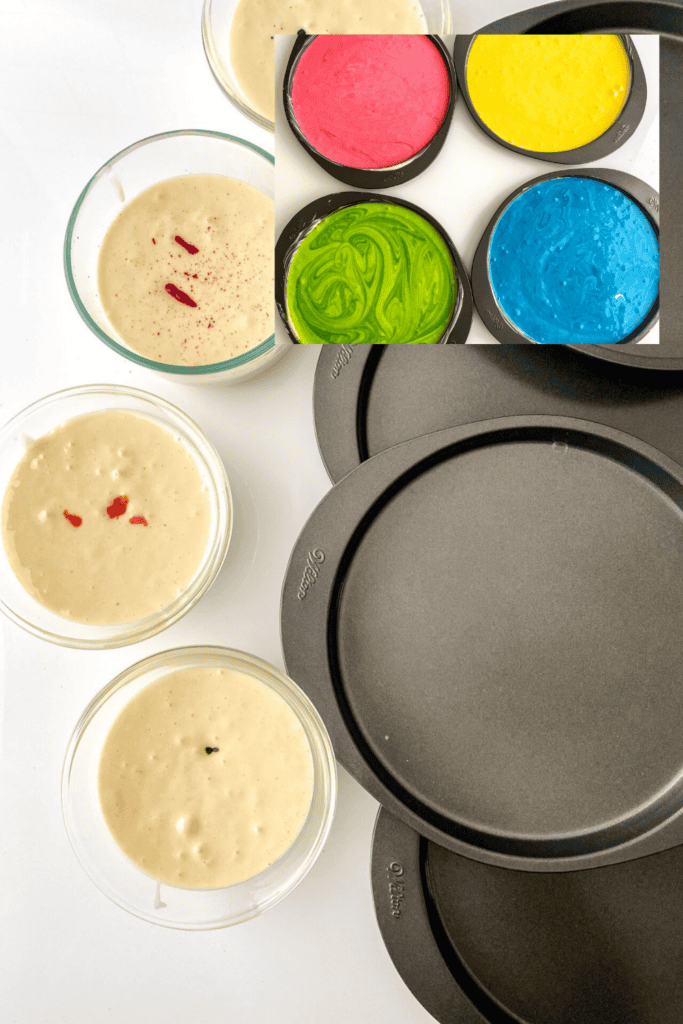
- Prepare your cake batter according to the package directions, then divide it into four bowls and color each with gel food coloring to create rainbow layers.
- Bake in greased 8-inch cake pans, allow the cakes to cool completely, and chill or freeze them before assembling for easier frosting and stacking.
- Make a batch of vanilla buttercream frosting and apply a thin crumb coat to seal in loose crumbs.
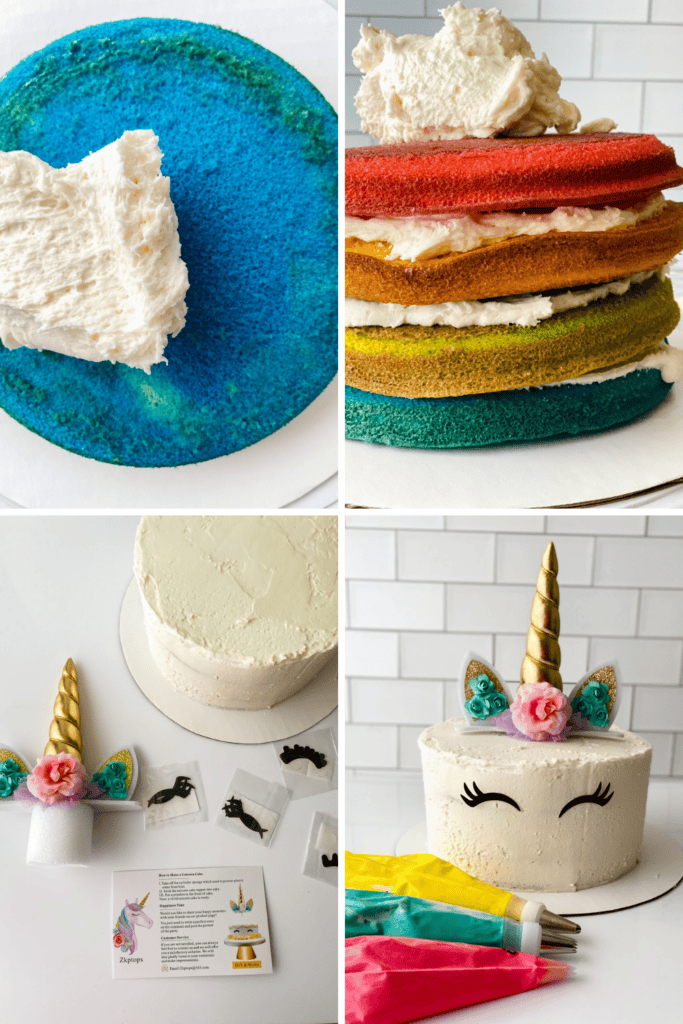
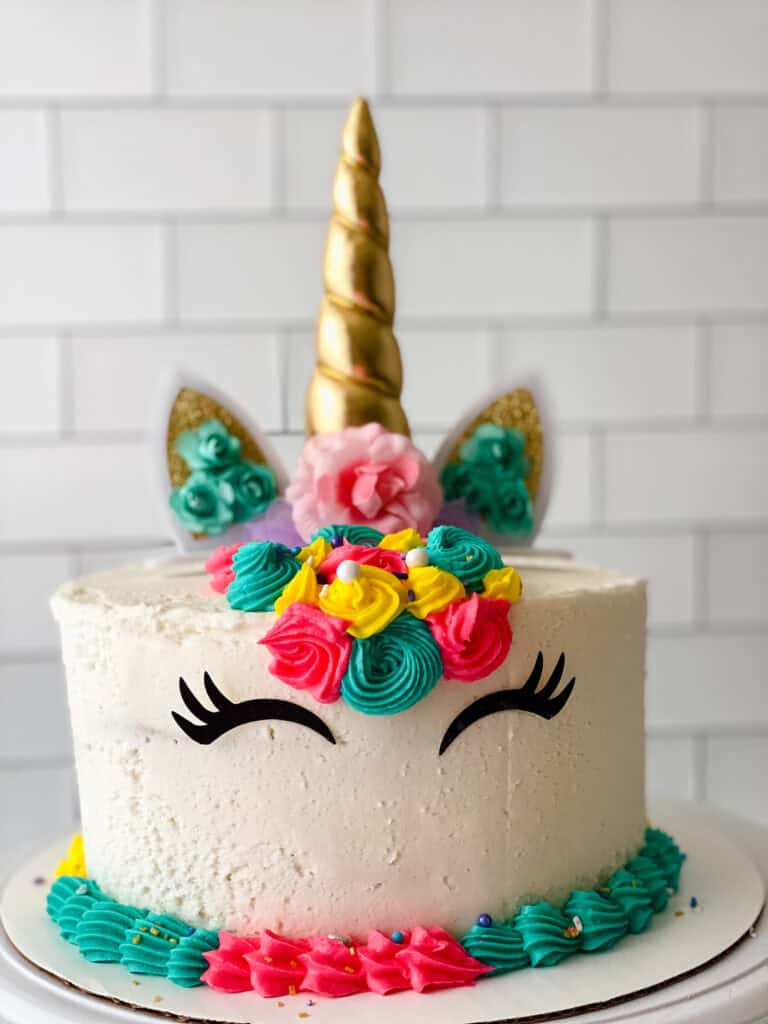
- Once the frosting has set, add a final layer of frosting and decorate with a unicorn horn, ears, eyes, and a colorful buttercream mane made with rosettes and swirls.
- Finish with sprinkles, edible glitter, or gold accents for a magical touch.
Don’t Forget To…
- Scroll down to print the full recipe with step-by-step instructions and exact measurements.
- Check out my Kitchen Essentials for the pans, mixing bowls, and baking tools I use to make this recipe a breeze.
- Save or share this recipe on Pinterest!
Bake the cake layers 1-2 days ahead and assemble before serving.
A cake made with four 8-inch round cake layers typically serves 12-16 people, depending on how large the slices are cut.

More Magical Birthday Cake Ideas
If you loved making this Rainbow Unicorn Cake, check out these fun party desserts:
- Looking for more magical ideas? Treat yourself to unicorn donuts, mermaid cupcakes.
- Planning a birthday party? Check out our creative birthday cake ideas to make the day unforgettable.
- For even more inspiration, check out these Unicorn Cake Ideas featuring colorful decorations, creative designs, and magical birthday cake themes perfect for your next celebration.
Chefmaster 4-Bottle Set of Neon Food Coloring, Liqua-Gel® Vibrant Colors, Professional-Grade Dye for Easter Eggs, Icing, Frosting, Fondant, & Batters, Fade-Resistant, Made in USA, 0.67 ozZkptops Unicorn Cake Topper Birthday Party Supplies Unicorn Birthday Decorations Gold Horn Cake Topper Accessory with Eyelashes Cute Handmade Reusable Cake Toppers for Girls Kids Women 5.8 Inch
Glad for Kids Unicorn Theme Disposable Paper Plates, Heavy-Duty Soak-Proof Round Plates for Kids Birthdays, Parties, and Everyday Meals, Microwave Safe, 8.5 Inch, 20 Count


How to Make a Unicorn Cake
Ingredients
- 2 White Boxed cake mix
- Buttercream icing
- Unicorn sprinkles mix
- Unicorn cake topper
- Electric Gel Colors
Instructions
- Prepare cake mix according to box instructions.
- Separate the cake mix into four bowls using electric gel colors 1 to 2 drops of coloring will be enough for a favorite cake color.
- Lightly grease cake pans and line bottom of the pan with parchment paper.
- Pour batter into pans and bake according to box instructions.
- Because these are 1 inch cake layers they may cook faster than your box tells you. Begin to check them at the 15 minute mark.
- Cakes are done when you stick in a toothpick in it and it comes out clean.
- Remove from oven and allow to cool at room temperature until the cakes can be wrapped in plastic wrap in the freezer.
- Make your buttercream.
- Crumb coat the cake with a thin layer of vanilla buttercream making sure to put the buttercream in between each layer as you build a cake.
- Allow the cake time to rest before moving on to the next step. The buttercream will crust over, meaning when you touch it with your finger after about 15 minutes the Icing is no longer wet.
- Prepare your colored frosting and put into piping bags with star tips. While using a color is not necessary for this particular activity it will be helpful to change the tips out.
- Remove the unicorn horn cake topper and the ears from its package and center at the top of the cake.
- After placing the unicorn horn topper on top of the cake select your eyelashes and placing them as symmetrical as possible.
- A medium stiff consistency icing is going to be required to create the roses on top of the unicorns head using a star tip we will be able to create roses on top of the cake.
2 Comments