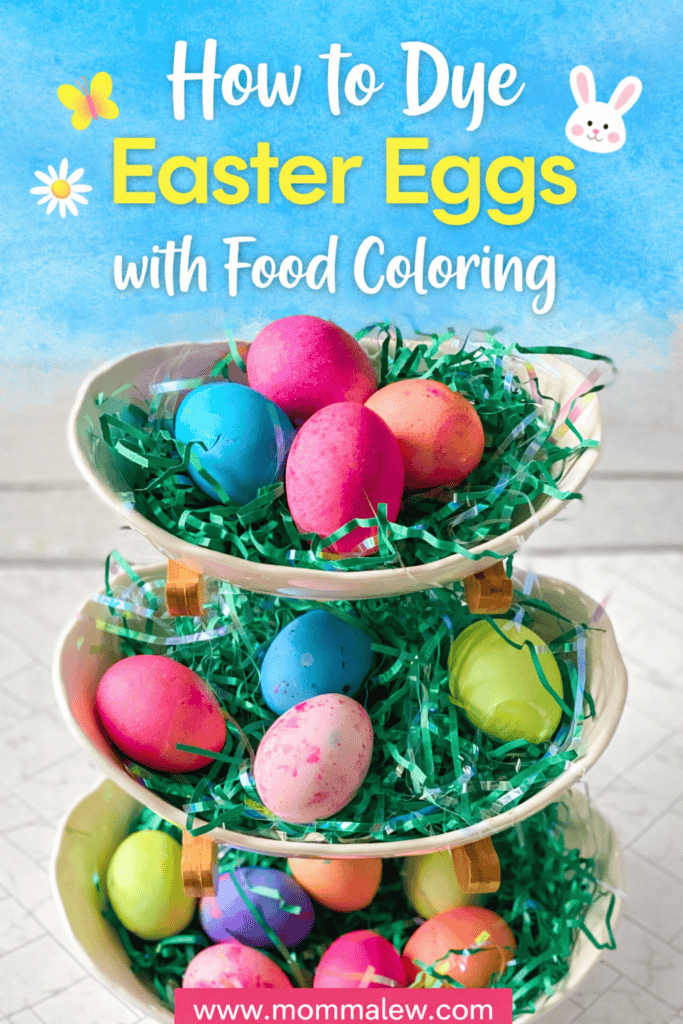
How to Dye Eggs with Food Coloring
Knowing how to dye eggs with food coloring sounds simple enough – until you’re standing in the kitchen with a dozen eggs and colors that just aren’t turning out the way you imagined.
These directions will give you those bright, cheerful Easter eggs without a kit.
This is honestly one of the easiest (and most affordable) Easter traditions — perfect for Easter baskets, decorating your Easter brunch table, or just making sweet memories with your family.
And you probably already have everything you need in your kitchen.
Be sure to save this guide for later so you have it ready when it’s time to dye eggs!
As an Amazon Associate, I earn from qualifying purchases. This post may contain affiliate links, meaning I may receive a small commission at no extra cost to you when you make a purchase through my links. Thank you for supporting my kitchen!
How do you color eggs with food coloring?
1. Hard Boil Your Eggs
- Use white eggs for brighter colors. Brown eggs will dye, but the colors turn out deeper and more muted.
- Place eggs in a single layer in a pot and cover with cold water.
- Bring to a boil, turn off the heat, cover, and let sit for 10–12 minutes.
- Transfer to an ice bath and let cool completely before dyeing.

Dash Rapid Egg Cooker – Boiler, Poacher & Steamer – Includes Measuring & Recipe Guide – Dishwasher Safe – BPA Free – Holds 7 Eggs, Aqua CAROTE 1.5Qt & 3.0Qt Sauce Pan Sets with Lid Cooking Pots Nonstick Saucepans Cookware Set with Pour Spout Small Kitchen Pot, Induction Comptable, Easy to Clean, PFOA FREE (White Granite)


2: Make the Dye
In a cup or small bowl, mix:
- ½ cup hot water
- 1 teaspoon white vinegar
- 10–20 drops liquid food coloring
Stir until combined.
More drops = deeper color. Fewer drops = pastel shades.
Want more than just basic red, blue, and yellow? You can mix colors to create beautiful custom shades.
Try these combinations:
- Yellow + Blue = Green
- Red + Blue = Purple
- Red + Yellow = Orange
- A tiny drop of blue in pink = Lavender
For softer pastel colors, use fewer drops of food coloring or add a little more water.
For bold shades, use gel food coloring or increase the number of drops.

Chefmaster – Liqua-Gel Food Coloring – Fade Resistant Food Coloring – 12 Pack – Vibrant, Eye-Catching Colors, Easy-To-Blend Formula, Fade-ResistantHeinz All Natural Distilled White Vinegar with 5% Acidity (16 fl oz Bottle)


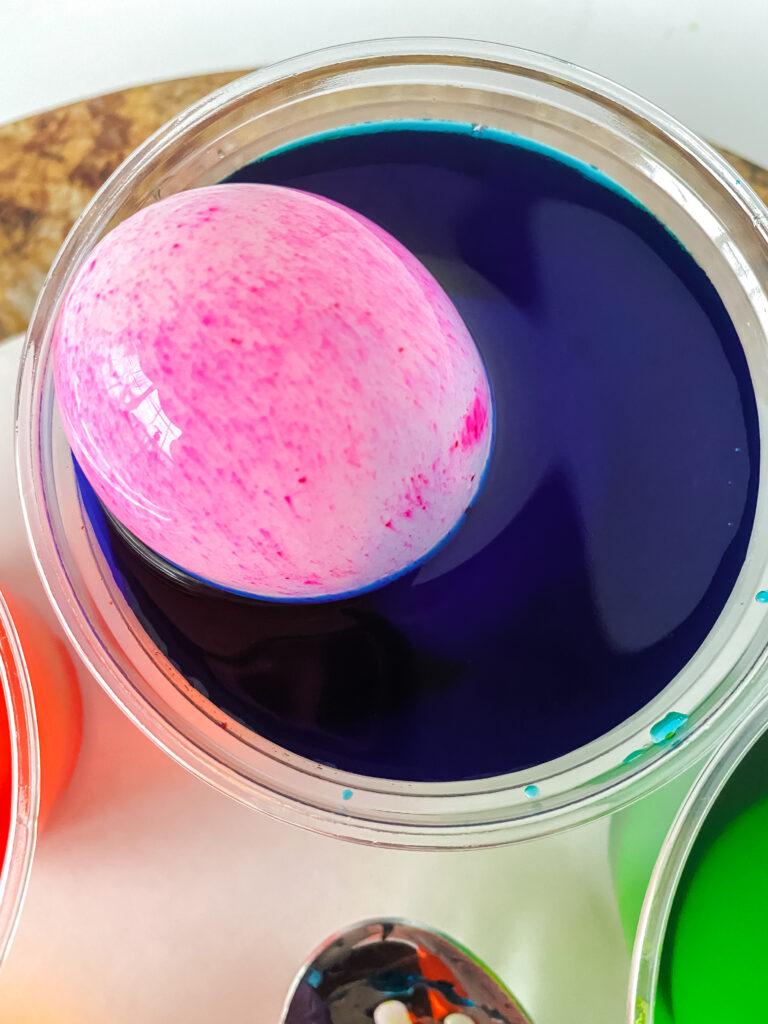
3: Dye the Eggs
Gently lower an egg into the dye using a spoon.
- 1–2 minutes = light pastel
- 3–5 minutes = medium color
- 5+ minutes = bold, vibrant shades
You can leave eggs in the dye for up to 10 minutes for really rich color. Just check them occasionally so they don’t get darker than you planned.
Remove and place on a wire rack or paper towel to dry.

Spring Chef 10 x 15 Inch Stainless Steel Cooling Rack for Cooking & Baking – Heavy Duty Cookie Cooling Rack for Kitchen – Oven Safe – Fits Jelly Roll Pan – Dishwasher SafePAAS Whiskers: Bunny Bottom Egg Dipper, Dye Eggs with No Mess!Tupperware (1) Egg Lifter Scoop for Hard Boiled Eggs in PinkPAAS Color Cups Egg Decorating Kit – America’s Favorite Easter Tradition5-Piece Decorating Brush Set – Food Safe Decorating Brushes for Dusting Edible Glitter and Painting with Edible Color on Treats Kitchen Utensil Bakery Tools (5, Purple)


Storage Tip
If you plan to eat the eggs, refrigerate them within 2 hours and enjoy within one week.
Always cold. Let your hard-boiled eggs cool completely before dyeing them. Warm eggs can cause uneven coloring and streaks, and they’re more likely to crack when placed in the dye. Cold eggs give you smoother, more even color — and they’re easier to handle.
You need vinegar. Food coloring won’t cling properly to the shell without a little acid. Add 1 teaspoon of white vinegar to ½ cup of hot water before adding your food coloring. The vinegar helps the dye bond to the shell so the color sticks evenly and looks vibrant instead of blotchy. Pro tip: Wipe eggs gently with vinegar before dyeing to remove any residue.
Technically yes… but not very well. If you only use water and food coloring, the color will look faint and may rub off easily. Without vinegar, the dye doesn’t bind properly to the shell. So while it can tint the egg slightly, it won’t give you those bright Easter colors most people want.
Yes, as long as they’ve been refrigerated within 2 hours. Store in the fridge and eat within one week.

Nifty Easter Egg Carousel – White Powder Coat Finish, Spins 360-Degrees, Kitchen Centerpiece Display Stand, Decorative Egg Holder, Lazy Susan PlatformCup Egg Tray Holder (White)20 Pcs Craft Drying Rack, Easter Eggs Drying Rack, Craft Drying Racks for Classroom Crafts Rocks and Egg Painting Perfect forPainting DIY Crafts and Other Small Arts and Crafts


Food Coloring vs. Store-Bought Dye Kits
| Feature | Food Coloring | Store-Bought Dye Kit |
|---|---|---|
| Cost | Budget-friendly (uses pantry staples) | Requires purchase each year |
| Convenience | No store trip needed | Grab-and-go ready |
| Color Options | Fully customizable shades | Limited to included tablets |
| Vibrancy | Rich and bold (with vinegar) | Consistent but preset colors |
| Decorating Tools | DIY (spoons, cups, rubber bands) | Often includes dip tools & stickers |
| Best For | Last-minute dyeing & custom colors | Themed kits & kid-friendly extras |

Creative Ways to Decorate Easter Eggs
- Glitter Eggs or using shaving cream are ideas for a fun simple craft at Easter time.
- Use a white crayon to draw on the eggs or wrap the egg in rubber bands.
- Use Kool Aid to Dye Easter Eggs
- Wrap rubber bands around the egg before dyeing for striped designs
- Double dip eggs in two different colors
- Add 1 tablespoon of oil to the dye and swirl gently for a marbled effect

If you’re planning your holiday menu, don’t miss these Easter brunch ideas and festive Easter desserts to complete your celebration.
- Put those beautifully dyed hard-boiled eggs to good use with these Easter deviled egg recipes that are creamy, flavorful, and perfect for your holiday table.
- Bright, fresh spring dessert recipes are the perfect way to finish off your Easter meal with seasonal flavors everyone looks forward to.
- These adorable Easter cupcakes are almost too cute to eat and make a fun baking project to enjoy with the whole family.
- Keep the kids entertained before and after egg decorating with printable Easter activities that are easy, mess-free, and full of holiday fun.
- If you love having everything in one place, an Easter recipe book makes planning your menu simple and stress-free year after year.

Dying Eggs with Food Coloring
Ingredients
- Table Covering
- Boiling Water
- White Vinegar
- Food Coloring liquid or gel
- Plastic Cups or Bowls
- Hard Boiled Eggs that have been Cooled
- Paper Towels
Instructions
- Fill cups, bowls or containers with the enough water to cover the egg, 1 teaspoon of white vinegar and food coloring.
- Place the egg on a slotted or regular spoon and dunk into the mixture, turning occasionally so both sides are colored.
- Keep in the liquid up to 5 mins or longer for darker colors.
- Carefully remove the egg and set it aside to dry.
Notes
- The key to properly dyed eggs is taking your time throughout this process.
- Cover your work surface with towels or newspapers to protect them being stained.
- Each color will need enough boiling water to cover the egg completely once submerged.
- Using liquid colors will require up to 20 drops, using gel colors requires 1-3 drops depending on depth of color.

3 Comments